Tuesday, July 26, 2011

Brussel Sprouts with Balsamic Vinegar

You know, growing up I never ate a brussel sprout? Not even one? So when people would complain about them I never really knew what to say because I'd never been subjected to them. Thanks mom and dad. NOT. Maybe they were fed too many brussel sprouts as kids, and maybe they just didn't like them. But I love them.
 My first brussel sprout was on Christmas day in my second year of university, also my first Christmas away from family. My friend's mom served a side dish of brussel sprouts that had been steamed and then quickly sauteed in butter and garlic... I was instantly converted. Since that fateful Christmas day I have tried a few variations of brussel sprouts, and the following recipe is my favorite. The best thing about it is that you can add whatever you want to it and it still tastes delicious... By anything think pine nuts, bacon, goat cheese... think salty goodness. 

I know I just posted a balsamic vinegar recipe, but just keep reading and prepare to say 4 words you never thought you would utter: I love brussel sprouts!


Ingredients:
  • Brussel Sprouts - about 20 (or 5 per person_
  • 1/4 cup balsamic vinegar 
  • Salt, pepper to season at the end
Directions:
  1. Wash the sprouts and remove any ugliness like brown leaves. Slice an X into the base of each little bulb (make sure you don't slice the whole thing apart, you just want to score it!). Preheat the oven to 450 F.
  2. Place the brussel sprouts in a medium saucepan and add enough water to cover them. Put the pan over medium-low heat and simmer for 10-15 minutes.
  3. Once the sprouts are fork tender, spread them out on a greased, rimmed baking sheet. Bake the sprouts for 15 minutes in the top third of the oven, turning once halfway.
  4. While the sprouts are crisping up, put the balsamic vinegar in a small saucepan over medium heat and reduce until it is a thicker consistency, almost like a slightly warmed syrup. 
  5. Remove the brussel sprouts from the oven once they are getting brown and toss them in the balsamic vinegar reduction. Serve immediately and devour them. 
Enjoy!

Cookbook Shoutout

I am slowly expanding my cookbook collection, and I wanted to share the titles that I have (and adore!). Click on the title to see it in its full glory at Amazon :)


Wednesday, July 20, 2011

Basil and Peach Pizza

The universe wanted me to have this pizza for dinner. My sister emailed me a recipe from two peas & their pod that looked so delicious and summer-perfect that I knew I would have to make it soon. Check out the pictures of their Peach, Basil, Mozzarella, & Balsamic Pizza that had my mouth watering and my tummy grumbling! Ooooh weee!

Oddly enough, when I went to the grocery store a few hours after drooling over their blog, all of the piza ingredients were on sale! Okay, Universe, I hear ya! I'll do it! ...

I tweaked the recipe and cheated on the crust... yes, I buy pre-made pizza shells and they are amazing! One time I tried to use store-bought dough, and my BF had to intervene before I had a meltdown because I couldn't roll it out properly. Never again! Well... never again for now :) My version is not nearly as beautiful, but it sure is tasty!

I really hope you try this pizza because it is so yummy!

Ingredients:
  • Mini pizza shell
  • 1 tsp. minced jalepeno
  • 5 large basil leaves, finelychopped
  • 1/2 peach, thinly sliced (unless you can resist eating the other half, in which case you can use the whole peach)
  • 2 tablespoons balsamic vinegar
  • Mozzarella
Directions:
  1. Preheat the oven to 525 F, and heat a small skillet over high heat. Once the pan is hot, add a tiny bit of olive oil and the peach. Cook for about 5 minutes, stirring constantly to make sure everything gets cooked and soft!
  2. In a separate small pan, reduce the balsamic vinegar to about half the quantity over medium-low heat. 
  3. Combine the peaches, balsamic, and basil in a bowl, and mash!
  4. Spread the peach mash on the pizza shell, top with mozzarella, then sprinkle on the jalepenos. Cook in the center of the oven on a baking sheet (or hot pizza stone) for 5 minutes or until the cheese is bubbly and brown. 
Enjoy!!!

Monday, July 18, 2011

Mexican Side Dishes

I love love love love love Mexican food. There is a restaurant in Denver that I have been going to my whole life... My mom started going there when she was in high school and there is a reason it's still around (not that you're old, mommy!). Smothered bean burritos! Green chili! Shredded beef enchiladas! Huevos rancheros! ... and don't forget the Shirley Temple. I swear, it's like root beer and pizza - shirley temples and Mexican food are the ultimate food+drink combination.

Now, it's pretty simple to whip up a mexican main dish (burritos, fajitas, tacos... same basic ingredients, just a different method of putting it all together). Side dishes, on the other hand, are easily forgotten in my experience. Here are some tried and true sides (each with three variations!) for your fiesta.


Guacamole

Ingredients:
  • 2 large avocados
  • 1 tablespoon lemon juice
  • Salt/Pepper to taste
  • 1/4 tsp. dried thyme
Directions:
Halve the avocados, toss the pit, mash with remaining ingredients in a bowl. 

Variations:
  1.  Simple Guacamole: add in 1/4 finely diced red onion, 2 chopped tomatoes, and a dash of cumin.
  2. Spicy Guacamole: add in 1/2 finely diced jalepeno, a dash of hot sauce, and a pinch of cayenne powder.
  3. Loaded Guacamole: add in 1/2 cup corn (you can even sautee them to give a more roasted flavor), 1/4 cup chopped cilantro, and 3-6 roughly chopped slices of pickled jalepeno.


Refried Beans

Ingredients:
  • 1 can refried beans
  • Salt/Pepper/Cumin/Dried Oregano
Directions:
Add the beans to a small sauce pan, cook over low heat until ready to serve, stirring occasionally (5-10 minutes).


Variations:
  1. Drunken Beans: Add 1 can of beer to the beans. 
  2. Spicy Beans: Add 1/2 chopped jalepeno, 3 dashes hot sauce (Cholula!), 1 minced clove of garlic  and oil. Cook on low for 2 minutes before adding the beans.
  3. Veggie Beans: Add a dash of hot sauce, chopped black olives, corn, chopped cilantro, and 1/4 chopped red onion to the beans.


Salsa

Ingredients:
  • 4 large tomatoes
  • 1/2 yellow onion
  • Cilantro
  • Salt/Pepper
  • 2 bell peppers (red, green, yellow, orange, whatever!)
Directions:
Chop all ingredients to the desired size (I like everything to be roughly the same so it all has an equal chance of making it onto a tortilla chip) and mix in a large bowl. Refrigerate :)  This salsa is best when the flavors have had at least 6 hours to meld... The longer you can hold out, the better!!

Variations:
  1. Roasted Salsa: Preheat oven to 450. Chop all ingredients and put all except cilantro in a 9x13 pan with a drizzle of oil on top. Roast for 20+ minutes, or until tomatoes are starting to wrinkle and your oven smells like heaven. Let the veggies cool, then puree them with the cilantro in your blender.
  2. Sweet and Savory Salsa: Add diced mango/pineapple/apples. Any and all are great additions!
  3. Garlicky Salsa: You guessed it.. add garlic! You can lightly toast it first, sautee it in oil to infuse the flavor even more, or add it in raw!

Sunday, July 17, 2011

Pork Tenderloin Stuffed with Rosemary Panko

I first came across a stuffed pork tenderloin recipe a year ago (that I for some reason have never been able to find again) that changed the way I think of tenderloin forever. I always thought it was a dry piece of meat that was meant to be a vessel for gravy and nothing more. Hahaha silly me I was soooo wrong!

I have stuffed pork tenderloin with couscous and caramelized onions, italian breadcrumbs and sage, and finally, panko and rosemary. While these have all been delicious, my BF has decided that this week's tenderloin was one of his favorite meals I have ever made, so that's the recipe I'll share!

Feel free to tweak the recipe in any way you see fit! You can quickly toast the breadcrumbs/panko, you can stuff it with cranberries or apples, you can give it a nice pepper crust, you can do anything!!!


Ingredients:
  • 1 pork tenderloin
  • Fresh rosemary
  • Olive oil
  • Acid for marinade (I used some of the juice that my pickled jalepenos are in, but you can use lemon juice/apple cider vinegar/orange juice/etc.)
  • 1 cup Panko breadcrumbs
  • Salt, pepper
  • Twine/Toothpicks to fasten the stuffed tenderloin for baking
Directions:
  1. In a ziploc bag, put the tenderloin, about 10 leaves of rosemary, salt/pepper to taste, and 1 part acid to 2 parts oil. Marinate this for at least 24 hours. Do not cut corners! This is where all the magic happens and the longer your tenderloin marinates, the juicier it will be at the end. 
  2. The next day, preheat the oven to 350 F.
  3. Finely dice 10 more fresh rosemary leaves. Mix it with the panko, salt/pepper (and other seasonings if you want) in a small bowl.
  4. Slice the tenderloin like a hot dog bun - lengthwise and not all the way through! Using your hands, put the panko mix in the slot and then use kitchen string to tie it closed (4 pieces looped around each end and a quarter of the way in on each side). Toothpicks also work, they are just more work later to get out :)
  5. Roast the tenderloin on an ungreased baking sheet in the middle of the oven for 45 minutes, turning halfway through to ensure even browning. Remove the kitchen string (or toothpicks) before serving!
Enjoy!

P.S.  This goes great with "Thanksgiving-style" dishes like mashed taters and squash, as well as simple sides like peas and spinach.

Saturday, July 9, 2011

Roasted Chicken

This is the perfect roasted chicken for a weekend meal! I love dishes that provide enough for leftovers so that I can have easy meals the next few days. Roasting a whole chicken is great because you can use leftovers in so many ways! If you leave meat you can have chicken sandwiches, add it to pasta, roll it into a wrap! Keep the bones and you can make your own chicken stock or even your own chicken noodle soup! Oh the possibilities are endless with a roasted chicken... who doesn't love that?

This chicken has a crispy skin with juicy juicy meat on the inside, and it's really easy to prepare. I like to marinade my chicken for at least 6 hours, preferably a full 24 hours for maximum flavor. Trust me, the marinading is key!

Here is what you need for a perfect roasted chicken.....

Ingredients:
  • Whole raw chicken (2-3 pounds)
  • Olive oil/Canola Oil
  • Salt/Pepper/Seasoning (I use an Italian blend)
  • Fresh Rosemary
Directions:
  1. Put the chicken into a large ziploc bag, and add the oil and spices -- be generous with the spices! Get your hand in there and rub it all over the chicken, then after washing your hand with scalding water because raw chicken is bad bad bad, close the bag and refrigerate for 6-24 hours.
  2. Preheat the oven to 450 F, and put the chicken in a roasting pan. Stuff the cavity with the fresh rosemary and bake the chicken for 15 minutes. 
  3. Reduce the heat to 375 F and bake for and additional 50-60 minutes, or until the juices run clear when the chicken is pierced with a fork.
  4. Remove from the oven and tent with foil. Let the chicken rest for 15 minutes before carving and serving!
Enjoy!

Suggestions:
- My BF's mom adds a whole lemon to the cavity of her chicken before she roasts it, which adds a subtle lemon flavor and adds to the juiciness!
- Stuff rosemary stalks under the skin of the chicken before roasting, just remember to remove them before carving!
- Squeeze some lemon juice into the marinade bag to tenderize the chicken even more and add lemon flavor!
- Put peeled garlic cloves into the cavity before baking for a garlic flavored roast chicken

Baked Chicken Wings


Football season is here, and that means football party foods are recirculating.  This recipe requires very little effort and attention, which makes for excellent party food.  These are also not breaded or deep fried, keeping them on the healthier side of things which is always nice when football parties are usually laden with fatty or fried foods. The icing on this proverbial wing cake is that while it requires the same 3 ingredients, you can adjust the amounts to suit your preferences every time: barbeque, Frank's hot sauce, soy sauce. Also, if you want a less saucy wing you can marinade the wings in a ziploc back, then remove them from the sauce before baking. Alternatively, you can also reserve a portion of the sauce when you first whip it together to toss the wings in post-baking (don't re-use the marinade that the raw chicken sat in). You see? The possibilities are endless.

Ingredients:
  • Wings 
  • Barbeque Sauce
  • Soy Sauce
  • Hot Sauce (Frank's)
Directions:
  1. Preheat oven to 400 F, and grease 1 large rimmed baking sheet. 
  2. Combine the sauces in any ratio you prefer to make about 3/4 cups of sauce per 30 wings. 
  3. Toss the wings in the sauce in a large bowl, then pour onto the prepared baking sheet. Spread the wings so they are in a single layer, and bake for 20 minutes in the middle of the oven. Flip them, and bake another 20 minutes.
  4. Using tongs, transfer the wings to your serving dish and let them sit for 2-4 minutes before serving so you don't burn your fingers off!

Monday, July 4, 2011

Tofino Fare

I just got back from a vacation in Tofino (one of my favorite places in this planet) and I find myself disappointed in my fridge items after all of the delicious meals I had this weekend... I look forward to the food in Tofino every year, and it was especially tasty this Canada Day weekend!

Shelter Restaurant
Smoked Salmon Plate (shared among 4)
Oysters
Meares Island Chowder
Chevre Cheesecake
                                   Apple Pie with Homemade Vanilla Ice Cream 

I had been talking about how I was probably just going straight for dessert, but once we got the restaurant the BF's family convinced me to put a little bowl of chowder in my belly to even things out... I have had the chowder before, and it never fails to please my palate!!! The smoked salmon and clams are abundant and smooth.I really liked the Chevre Cheesecake which was topped with a blackberry compote. I expected the goat cheese to be really mild and hardly noticeable, but it was really intense. I like goat cheese, and it wasn't a very sweet cheesecake which gave it bonus points in my opinion. The apple pie was classic, except the apples were sliced paper thin which gave it a very different texture-- very light and not as gummy as classic pie. The vanilla ice cream is something that I normally don't go crazy for, but it had a very rich vanilla flavor that I liked.

Sea Shanty
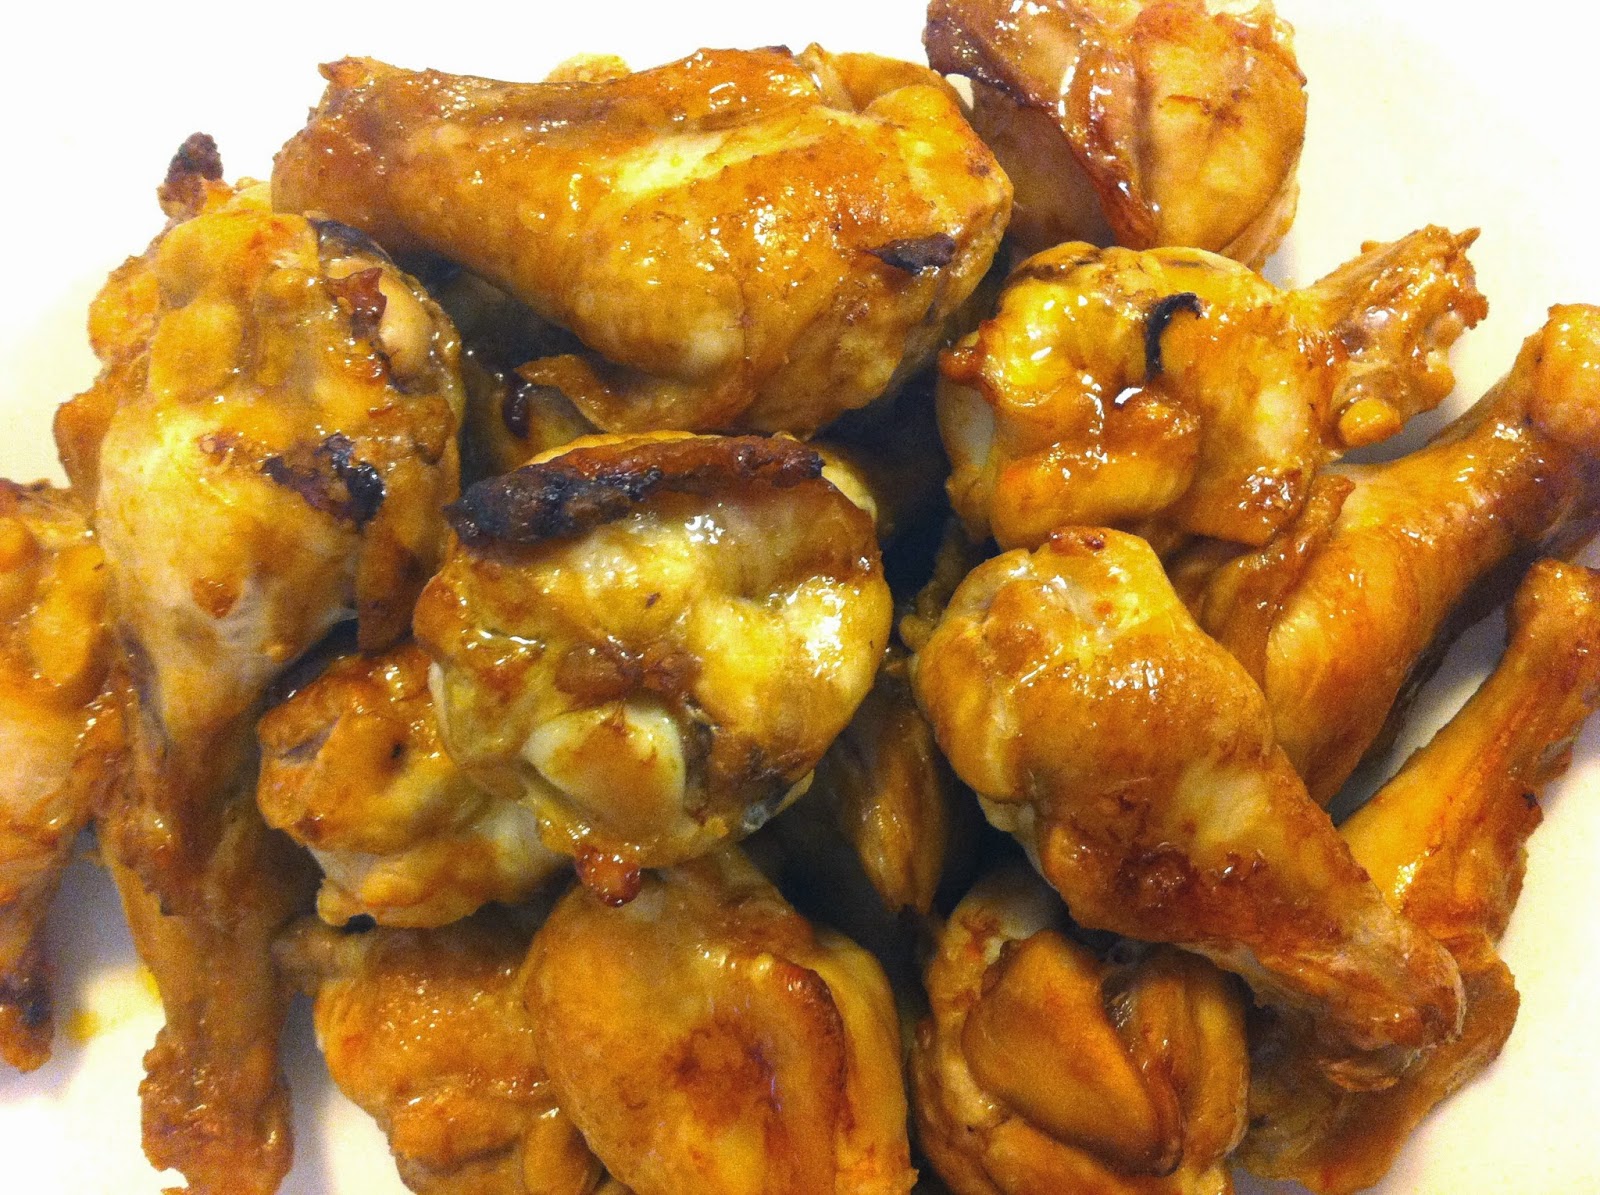
Shanty Pizza with Chicken and Onions

I ordered the Shanty Pizza, which is just a cheese pizza with a house marinara, so I added chicken and onions. The marinara sauce was obviously fresh because of the rich tomato taste, and the chicken and red onions were juicy and cooked inside a layer of the cheese so they stayed put. It was honestly the best pizza I have ever had! The crust was not too thick, not too think, corn meal on the bottom for crunch, fresh marinara, sharp cheese... ahh I'm so hungry just thinking about it!

Wicaninnish Inn Restaurant
Linguine with Smoked Chicken in a Pesto Cream Sauce
 Mai Thai

This dish was the chef's special, and it was everything I imagined and more. Normally I can't finish any pasta plate I order, but I inhaled this and had to make a conscious effort to save a bite for the BF. I am definitely going to try to recreate this dish during the week! Also, they had Mai Thai's on special, and this one was the yummiest I've had since I was slurping one out of a bucket in Bangkok (it was more glamorous than it sounds).

I also have to mention that my BF got the Wicked Bagel: smoked salmon cream cheese, prawns, shaved cucumbers, capers.... ooh it looked divine! He ate it so quick I looked back to beg for a nibble and it was gone!

 ......................................

And this is not a restaurant meal, but on our last night we bought 2 crabs from a guy selling them out of the back of his truck and had surf n' turf! We boiled the crab and dipped the meat in drawn butter (we called it "budda", it made a difference in the experience), which we ate as an appetizer about 30 minutes before we threw 4 t-bone steaks onto the grill.  We each had 1/2 crab and a t-bone steak, and it was the perfect amount for a long, drawn out dinner. The BF's mom roasted asparagus in the oven and cooked up some rice, which we ate as sides with the steaks. All she did to prepare the t-bones was to brush olive oil over each and sprinkle salt and pepper on top... mine was cooked beautifully to medium rare, and it was such a treat! If you ever get your hands on fresh crab in Tofino, I highly recommend having a lazy picnic dinner with it!