Tuesday, December 20, 2011

Roast Beef and Carrot-Tater Mash

Roast beef is a classic dish for one reason in my books: it's the dish that keeps on giving... roast beef leftovers are fantastic! I have roast beef sandwiches (I use this carrot-tater mash as spread, it's divine), beef stroganof, beef stir-fry with snow peas and water chestnuts, beef burritos... oh man. I set myself up for a week of delicious and easy meals when I make roast beef. But when it's fresh out of the oven, oh boy, I have to have roast beef and mashed potatoes!


Makes: 8 servings roast and potatoes


Ingredients:
  • 1 eye of round roast
  • 1 small yellow onion
  • 1 cup red wine
  • Sprig of rosemary
  • 3 russet potatoes
  • 3 medium-sized carrots
  • 3 tablespoons butter
  • 2 cups milk, room temperature
  • 1/2 cup feta cheese

Directions:

  1. Preheat the oven to 375 F. Season the eye of round generously with salt, pepper, and cumin then place in a baking dish. 
  2. Roughly chop the onion then place around the roast (I use an 8x8" pan so the onion is packed in right next to the roast). Drizzle the roast with a bit of canola oil, then pour the red wine over the onions. 
  3. Bake the roast uncovered in the middle of the oven for 20 minutes per pound. 
  4. When there is 20 minutes left for the roast, begin prepping the Carrot-Tater Mash by peeling the mashed potatoes and carrots. Chop them into 2 inch pieces then place them in a large pot, then cover with water. Bring to a boil, then turn to medium heat and cook at a fast simmer until the carrots are fork tender. 
  5. Remove the roast from the oven when it's finished roasting, (the potatoes and carrots should still be simmering) then set on a cutting board and tent loosely with foil. Let the meat rest for at least 15-20 minutes before slicing.
  6. Drain the carrots and potatoes, then place them in a large bowl. Blend them on low with an immersion blender, gradually adding in the butter, milk, and feta. Season with salt and pepper to taste and serve with the roasted eye of round. 

Enjoy!


Suggestion: You can use the red wine roasted onions for a topping or blend them into a gravy if desired, or you may just discard them.

Chicken Sandwiches with Cambozola and Roasted Garlic

I love using leftover chicken or turkey or beef for my sandwiches! There is something about eating a sandwich with leftover meat or poultry, it's like the homemade-ness of it lends a deeper flavor (or maybe just a deeper satisfaction in knowing that you're using up leftovers!).

I try to roast up something each week, like a chicken or a big beef roast so that I can have easy leftovers throughout the week to have on hand for my meals that week. One of the best and easiest ways to use up leftover meat is to put it in a sandwich! I love sandwiches with pretty much anything on them (it's a curse, really), but I do have a few favorite flavor combos and this is on the top of my list. It does call for a few extra steps that usually go against the whole "quick and easy" nature of sandwiches (see the roasted garlic recipe at the end), but trust me, it's soooo worth it.


Ingredients:
  • 1/2 cup chopped chicken
  • 2 slices sourdough bread
  • 1 tablespoon peach chutney
  • Cambozola wedge (may use brie if you don't like the chunks of blue cheese in cambozola) 
  • 2-4 cloves roasted garlic (or as many as you prefer!)
Directions: 
  1. Preheat the oven to 425 F. 
  2. Slice as many pieces of cambozola as desired to put on one piece of sourdough (I like 3 medium-sized slices). 
  3. Spread the garlic cloves across one slice of sourdough. On the other slice, spread the chutney.
  4. Put the cambozola on the garlic-spread slice of bread, and top the chutney-spread slice with chicken.  Put the sandwich halves face up on a baking sheet and bake for 8 minutes. 
  5. Remove the open sandwich from the oven, then put the sandwich together. Eat while it's hot!
Enjoy!


Simple Roasted Garlic: 
Preheat the oven to 425 F. Slice off the top 1/2 inch of a head of garlic, so that each bulb is exposed on top. Place the head on a square of foil, drizzle with olive oil. Wrap the foil up around the garlic head and pinch it shut. Place in the middle rack of the oven and bake for 30 minutes, or until the garlic is fork tender. Let cool for 5 minutes, then use a knife to pop out each garlic clove, reserve in a small jar or even a ziploc bag. Hint: roasted garlic can punch up any dish... think mashed potatoes, quiches, pizza, alfredo/marinara sauce... the list goes on!

Monday, December 12, 2011

Ponzu-glazed Asparagus

Ponzu sauce is one of my new obsessions. It's perfect for dipping eggrolls or skewered chicken, it's yummy tossed with rice noodles and prawns, and glazed onto your favorite veggies like snow peas, baby corn, green beans, or, like this recipe, asparagus.  This is my favorite way to eat asparagus now!


P.S. this is the perfect side dish for my Asian-style ribs.

Makes 4 small side servings

Ingredients:
  • 1 tablespoon butter
  • 3 tablespoons water
  • 4 tablespoons ponzu
  • 1 bundle of asparagus
  • 2 cloves of garlic, minced
Directions:
  1. Chop off the tough end of each stalk of asparagus and mince the garlic, set aside.
  2. Heat a large skillet to medium-high heat. Once the pan is hot, add the asparagus and water (in that order). Cook the asparagus until barely tender, about 4 minutes. Pour out the excess water (if there's any left), then add the butter, garlic, and ponzu. Simmer over low for 15 minutes, until ponzu has reduced to a glaze. Serve hot!
 Enjoy!

Escargot-stuffed Mushroom Caps

I recently got turned onto these delicious bites, and it was love at first whiff. Well, not exactly. Escargot in a can, not so delicious smelling. But after you soak them in water, saute them in butter with garlic and scallions and stuff them into mushroom caps?... oh my. It's love all the way!

I'm not sure how it is in the States, but right next to the cans of escargot are little seasoning packets. I love the packets because it takes the escargots to an entirely new level of yum, but I'll provide spice suggestions just in case.

The first time the BF and I ate these with ribeye steaks and asparagus, and we were stuffed because it was so delicious but it was definitely too much food.The next time we had these, we just had asparagus on the side and it was perfect.


Makes  4 appetizers or 2 large sides.


Ingredients:
  • 1 can escargot
  • 3 cloves garlic
  • 12 mushrooms, white or brown
  • 1 scallion
  • 3 tablespoons butter
  • 1 cup white wine
  • 3 tablespoons cream cheese
  • Escargot seasoning packet
Directions:
  1. Preheat the oven to 375 F. Open the can of escargot and rinse them thoroughly. Place them in a bowl, then cover with water. Let sit for 5 minutes (or more!) before you start preparing the rest of the dish.
  2. Prepare the mushrooms for stuffing by cleaning them (wet a paper towel and rub them down) and then removing the stems. The easiest way to do this is to "pop" them out by pinching the stem as close as possible to the cap, then twisting your hand to pop out the stem like you would a cork in a bottle. You can also peel the caps if you're feeling wild. Place them in a lightly greased baking dish gill-side up.
  3. Finely chop the garlic and scallion. In a large saute pan melt the butter over medium-low heat, then add the garlic and scallion. Cook for 3-5 minutes, then add the escargots and wine. Turn the heat to medium and simmer for 5 minutes. 
  4. Add the cream cheese and the spice packet (or the desired spices, see suggestions below) and increase the heat again to medium-high. Cook for 10 minutes, until the wine-cheese mixture has reduced and thickened up. 
  5. Spoon the escargots into the prepared mushroom caps and top with parmesan (about 2-3 escargots per mushroom). Bake for 15-20 minutes and serve hot. 
Enjoy! 


Seasoning suggestions:
  • Garlic powder, parsley, lemon juice
  • Paprika, rosemary, thyme
  • Garlic powder, cayenne powder, cilantro

Saturday, November 12, 2011

Caramelized Pear Pie

I have a confession - I don't like most fruit. Like, I buy a bunch of bananas maybe once a month. The other day, however, I was drawn to the fruit section in the grocery store and I added 2 juicy pears to my basket, suddenly filled with the urge to have caramelized pears! Story of my life. My grocery list gets neglected all of the time, I'm just so easily persuaded by fresh produce!

Anyway, this is a great pie to bring to a pot luck or to eat by yourself while you're watching reruns late at night--it's not too sweet, not too heavy, just a yummy slice of heaven. Feel free to add more pears, or throw in apples instead. If you like a more savory dessert, add a light sprinkling of grated sharp cheddar before baking, it's delightful!


Ingredients:
  • 2 large pears
  • 1 cup cream cheese, room temperature
  • 1/3 cup + 2 tablespoons honey
  • 2 tablespoons butter
  • 4 tablespoons vanilla extract, separated
  • 1 egg
  • 1/4 cup chopped pecans
  • Ground nutmeg for seasoning (Optional)
Directions:
  1. Preheat the oven to 375 F, and bring the pie crust out in it's pan to sit at room temperature.
  2. Peel and thinly slice the pears. Heat a medium skillet to medium heat, add the butter and the pears. Cook until the pears have started to turn golden (I treat pears like onions, so use the same method you would use if caramelizing onions!).
  3. Add 2 tablespoons of the vanilla and 2 tablespoons honey to the pan and cook for another 10 minutes, until the pears are covered in a honey glaze and turning a deep golden brown.
  4. In a small bowl, mix the cream cheese with the remaining honey and vanilla. Mix in a pinch of nutmeg (optional). Spread the cheese mixture over the pie crust, reserving 2 tablespoons. 
  5. Spoon the caramelized pears over the cheese mixture, then top with the chopped pecans.
  6. Crack the egg into the bowl with the reserved cheese mixture, and mix together well. Pour over the top of the pie. 
  7. Bake for 10 minutes at the preheated temperature, then lower the heat to 350 F and bake for 25 minutes. Cool for at least 15 minutes before cutting, or chill and serve cold. 
Enjoy!


Thursday, November 10, 2011

Mushroom Quiche

The best thing about any and every quiche is that no matter what you throw in, it tastes delicious. Plus, it's great for breakfast, brunch, lunch, dinner, or snacks, which is gold in my book!

This is one of my go-to quiche recipes for when I need something quick and easy to snack on throughout the week. 

Ingredients:
  • 1 deep dish pie shell, refrigerated (pre-bought and thawed or create-your-own already laid in a pan)
  • 8 medium white mushrooms
  • 4 eggs
  • 2 green onions
  • 5 sliced of jarred jalapeno (or 1/3 medium jalapeno, sliced into rings)
  • 1 green chile
  • 1/2 cup + 2 tablespoons grated parmesan
  • Salt/Pepper/Cumin/Cayenne
Directions:
  1. Bring the prepared pie crust in it's pie pan out of the fridge, set aside while you continue preparing the quiche. 
  2. Preheat the oven to 375 F. Slice the mushrooms, chop the green onions, jalapenos, and green chiles. 
  3. Heat a large frying pan to medium heat. Add a tablespoon of butter or oil when the pan is hot then immediately add the prepared vegetables. Cook over medium heat until the vegetables have sweated their juices into the pan, about 5 minutes. Turn the heat to medium-high to evaporate the juices.
  4. In a medium bowl crack and whip the eggs and seasonings until light yellow and fluffy, about 3 minutes. Fold in 1/2 cup parmesan, then pour into the pie shell. 
  5. Scoop the vegetables into the pie shell, and top with the remaining parmesan. Bake for 10 minutes in the middle of the oven, then reduce the heat to 350 F and cook for 20 minutes.
  6. Remove the quiche from the oven and let it cool for 10-15 minutes before serving. 
Enjoy!


Hint: Quiches taste best 1 day after baking, so feel free to prepare this a day ahead and re-heat it in the oven @ 350 for 10 minutes.


Tips for other quiche fillings:
  • Sausage, olives, spinach
  • Artichokes, basil, tomatoes
  • Bacon, peas, cheddar, spinach
  • Ham, mushrooms, swiss
  • Chicken, corn, beans, salsa

Tuesday, October 25, 2011

Potato and Sausage Soup

Fall vegetables are great bases for hearty soups that can provide a week's worth of meals. This soup is particularly low-budget friendly and delicious. The ingredients are simple and basic staples which makes this a very low-maintenance meal. The flavors blend with time, so it's a great soup to make at the end of the weekend for easy dinners throughout the week.

Serves 2 hearty eaters, plus leftovers for 6 more modest bowls

Ingredients:
  • 4 potatoes
  • 1/2 cup cream (room temperature)
  • 2 cups milk (room temperature)
  • 1/2 small yellow onion
  • 8 oz. ground pork 
  • Dried thyme/rosemary, pepper, cayenne, salt
  • Splash of hot sauce
Directions:
  1. Preheat the oven to 450 F. Light coat each potato in olive oil, pierce with a fork a couple times each, then wrap individually in foil. Bake for 60 minutes. 
  2. Meanwhile, heat a medium skillet to medium-high heat and add in the ground pork. Dice the onion and add to the skillet, stirring occasionally to ensure even browning. You want this pork to get nice and crispy so it's texture will stand up to the soup. Season the pork with thyme, rosemary, coriander, pepper/salt, and a pinch of cayenne.
  3. Once the potatoes are done, unwrap each potato and slice in half lengthwise. Using a large spoon, scoop out the potato into a large pot. Add the cream, milk, and hot sauce. For a smooth soup, use an immersion blender to puree the potato. Otherwise, you can use a whisk to break up the potato into the soup. Turn the heat to medium-low and stir in the cooked pork and cook until the soup thickens and is heated through, about 25-30 minutes. 
  4. Serve hot!
Enjoy!

This soup is a meal in itself, but if you need some greens add chopped fresh spinach  to your bowl before ladling in the soup. 

Slow-Cooker Chicken Noodle Soup

A great way to get the most out of your ingredients is to keep leftovers in mind. I love roasting chickens because I know I can use some of the meat that night, whether it's the drumsticks or the breasts, and the leftovers can be used the rest of the week in a variety of dishes. I use the meat in sandwiches, burritos, pastas, salads... the list is endless! Once I'm getting tired of chicken (usually around day 3 because I use it in my breakfast burritos, my lunches, and my dinners!), I make soup with the remaining meat. The bones from the chicken are also great for making soup, as they lend amazing flavor and nutrients. Chicken noodle is a simple soup that can use up any leftover chicken and veggies in your refrigerator, and it's a filling and relatively low-calorie meal to boot!

Ingredients:
  • 1 chicken carcass (I like to keep everything, but you can also just use the bones from drumsticks, wings, etc. if you don't want to bother storing the whole cavity until it's soup-making time)
  • Left over chicken, cut up into small chunks
  • 5carrots
  • 8 stalks of celery
  • 1 large yellow onion
  • 1 bay leaf
  • Dried seasonings: oregano, cumin, thyme, rosemary, pepper/salt
  • 3 cups boiled noodles, al dente
Directions:
  1. Chop 2 carrots and 3 stalks of celery into 3" long pieces, the cut the onion in half. Store the remaining vegetables.
  2. Turn the slow-cooker to high, add in the chicken bones, the bay leaf, and the prepared vegetables. Pour in 8 cups of water and cook for 8 hours (tip: do this before bed and cook until morning). 
  3. Strain the broth over a large bowl, discarding the cooked vegetables. Dice the reserved carrots, celery, and onion and add them to the slow cooker. Add 6 cups of broth back to the slow cooker along with the pieces of chicken. Add seasonings to taste (go lightly and season again at the end of cooking), then cook the soup for 8-10 hours on low. 1 hour before serving, add the cooked noodles. 
Enjoy!

You can also make this soup in a stock pot, cooking low and slow. I just prefer my crockpot because I can set it and forget it!

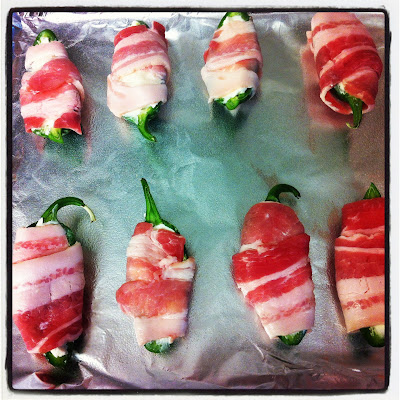
Cream Cheese Jalapenos Wrapped in Bacon

One of my favorite blogs for kitchen inspiration is the Pioneer Woman Cooks. She always has the most delicious recipes (not to mention mouth-watering photos!), and I'm never disappointed when I re-create them in my own kitchen. When I came across her blog a couple years ago, the first recipe that drew me in was her "Bacon-wrapped Jalapeno Thingies"... oh. my. lord. They are addictive and delicious, and I give them credit for one of the many reasons why my BF loves me. I'm only half-joking. I passed the recipe on to my BF's mother, and now the rest of his family is hooked as well.


I have tried variations of this recipe, like adding shredded cheese to the cream cheese, adding salt/pepper, adding sausage to the stuffing, changing the time and heat... While they were all yummy variations, they never came close to the unadulterated version. PW had it right (oh so right) the first time, so I'm just going to give you a link to her blog and recipe so you can go straight to the source of all things delicious!

Here is the link to the cream cheese stuffed jalapenos wrapped in bacon. 

I only have a few words of caution: Her website induces hunger, even if you just ate a feast. You will make these jalapenos more than once, no matter how hard you try to resist. These babies can be verrry spicy, so have some beer (or milk) on hand to tame them.


Baked Zucchini Sticks

I have a deep love for football season  and the reason is game time snacks. Loaded nachos, wings, dip, stuffed mushrooms... anything I can eat with my hands is fine by me! The downside to game snacks is that they are usually high-cal and delicious, which means that I'll eat about a week's worth of calories during one quarter. Yikes! So, over the past year I've fiddled with my favorite snacks to cut down the guilt without sacrificing flavor, and these zucchini sticks are a favorite (even my BF loves these, and he's a die hard fan of all things not healthy!).

Ingredients:
  • 3 large zucchini
  • 1/4 cup olive oil
  • 2 cups panko
  • Desired seasonings - salt/pepper/cumin/garlic powder/cayenne/thyme/paprika
Directions:
  1. Preheat the oven to 425 F. Line two baking sheets with foil and set aside. 
  2. Slice the zucchini into 3 x 1/2" sticks and set aside. Mix the panko and the seasonings in a medium bowl, then pour the oil into a bowl for dipping. Set up an assembly line to keep things easy and clean! 
  3. Dip one stick at a time first in the oil to coat, then into the panko. Make sure the panko is coating all sides of the stick, then place the stick on a prepared baking sheet. Repeat with the remaining sticks. Bake in the top third of the oven for 20-25 minutes, flipping the sticks once halfway through. An easy rule to remember is the sticks are done when the panko is golden!
  4. Use a spatula to transfer the zucchini sticks to a paper towel-lined plate, then let sit for a minute or two before serving. 
Enjoy!

Psssst! This recipe doesn't contain eggs, so it's a great recipe for when you have vegan/vegetarian guests!

Suggested dips for the sticks:
  • marinara sauce
  • ranch dressing
  • tzaziki
  • Thai peanut sauce
  • salsa
  • mustard


Wednesday, October 19, 2011

Roasted Squash

Roasted squash is a great side dish for pretty much anything, in my mind. It is great served with roasted chicken, inside a burrito, swirled into your favorite hearty stew, mixed with pasta shells and parmesan, or served alone with a dab of butter and a dash of salt and pepper! It's creaminess lends a richness to any meal without added tons of calories. I prefer to bake it in the rind and scoop out the contents because it creates a much juicier and smoother product than roasted slices.
The key to a juicy roasted squash that you scoop from the rind is simple: water.


Medium Sized Squash (acorn, butternut, spaghetti, etc.) : Serves 4

Ingredients:
  •  1 whole squash (try to find one that is blemish free!)
  • Water
Directions:
  1. Preheat the oven to 400 F. Pour 1 cup of water to a large casserole dish.
  2. Using a large knife, slice the squash in half lengthwise and place face down in the casserole dish. 
  3. Add enough water to cover 1/2" of the squash (2-4 cups depending on the size of the casserole and squash). 
  4. Bake for 1 hour or until fork-tender (think potato!) and remove the squash halves carefully from the pan and let sit for 15 minutes on a cutting board.
  5. Scoop out and discard the pulp and seeds with a spoon, then scoop the squash into a medium sized bowl. 
Here is where you can use your artistic and culinary license to make this squash your own! 
In case you're not in the mood for creativity and just want a recipe, dang it, here are some add-in suggestions:
  • 1 tablespoon butter, 1 dash pico de gallo
  • 1 tablespoon butter, 1 teaspoon brown sugar, dash of salt and ground nutmeg
  • Chopped fresh rosemary, thyme, and salt/pepper to taste
  • A few dashes of hot sauce, cumin, salt/pepper
  • Marinara sauce (I sometimes cook spaghetti squash and treat it like it's namesake, it's delicious!)
  • Toasted pine nuts
  • Chopped, cooked bacon


Friday, October 14, 2011

Easy Breakfast Burritos

I love a light breakfast that is light enough to keep me from falling back asleep, but hearty enough to keep my tummy quiet until lunchtime. These breakfast burritos are perfect because I use the small flour tortillas to limit the portion size, but they're packed with potatoes, eggs, and jalapeños to kick-start the day! They also take 20 minutes start to finish with time in between to blow-dry your hair or get dressed, so these are perfect for an on-the-go morning, too!

Serves 2

Ingredients:
  • 2 small flour tortillas
  • 2 eggs
  • 2 baby gold potatoes
  • 6 slices of pickled jalapeño
  • Salt/Pepper/spices to taste


Directions:
  1. Slice the potatoes into thin rounds, about 1/8" thick. Add 2 cups of water to a deep, medium-sized skillet and turn to medium-high heat. Add the potatoes and a dash of salt. Let them simmer until tender, about 7 minutes. 
  2. Drain the water, add a splash of oil or a small amount of butter to the pan to give the potatoes some color, then after about two minutes turn the heat to medium. 
  3. Dice the pickled jalapeño, add it to the potatoes in the pan. Crack the eggs into the pan, add salt, pepper, and any spices you want (I like cumin, cayenee, oregano, and garlic powder). Mix  everything together, stir constantly until the eggs are cooked, (about 2 minutes from cracking time). 
  4. Pile half of the mixture onto the center of a tortilla. Fold the tortilla into a burrito (I like to fold the bottom up a bit then roll it to the left so it's sealed at the bottom and open at the top, perfect for eating by hand as I walk out the door!), and repeat with the second tortilla for burrito #2!
Enjoy!

Tuesday, September 27, 2011

Slow Cooker Short Ribs

After recently eating grilled beef ribs and wanting more more more and then peeking at Pioneer Woman's blog this last week, I knew I was done for. Not to mention, the grocery store had a special on short ribs, so I think it was a message from the universe saying go for it, Gail, eat some short ribs this week.

Short ribs are hearty, delicious, and perfect for the pre-holidays in the fall.

Because I've spent the past few hours hemming and hawing over which version of short ribs tickles me the most, I've decided to give you all of my versions because they are all sooooo good and soooooo easy. Like, sad easy. Like, you will have a moment of panic when you are finished assembling everything because you'll think that you forgot half the recipe. It just makes these short ribs that much more glorious, in my book.
 

Ingredients:
4 short ribs
2 cups of sauce

Sauces:
  • Peanut sauce (Thai style)
  • Barbeque sauce
  • Enchilada sauce
  • Green chile sauce
  • White wine + 2 tablespoons each butter/flour
  • Red wine + 2 tablespoons each butter/flour
  • Cream + beef stock, equal parts

Directions:
Put the ribs in the slow cooker, top with sauce, and cook on high heat for 5 1/2 hours, flipping the ribs and stirring the sauce halfway through.

Enjoy!

What to serve with the ribs:
  • Sauteed mushrooms
  • Roasted Asparagus with garlic and lemon
  • Roasted squash
  • Stuffing
  • Creamed spinach
  • Rice/Quinoa
  • Mashed taters
  • Green bean casserole

Monday, September 26, 2011

Stuffed Poblanos with Slaw

Here in Victoria, poblanos are a bit like best-meal-of-my-life-why-can't-I-remember-that-restaurants'-name-or-place? moments.. You know they're out there, somewhere, and you've tasted it before and you want more of it... but you can't seem to find it. I have been trying to make stuffed poblanos for my bf's familia since last summer, but each time I peruse the pepper section the poblanos are gone. I was beginning to wonder if they even stocked poblanos until the other day... I know, I know, I should have just titled this "Spoiler Alert" because obviously I found a poblano to stuff and devour, which is exactly what I'm having for dinner tonight.

My sister is a genius and she mentioned that hot sauce (specifically, Chipotle hot sauce) on coleslaw is divine, and it's been my new obsession of late. Tonight I tried something different yet equally simple, I mixed my slaw with salsa, and it was the perfect side to the stuffed pepper. I am not putting an actual recipe for the slaw because it would be exactly what I just described, but with to taste written next to the coleslaw and salsa... not really a recipe.

Anywho, enjoy the poblano!

Serves 1
Ingredients:
  • 1 poblano
  • 3 large white mushrooms
  • 2 green onions
  • 1 cup spinach
  • 3 tablespoons shredded cheddar
  • spices (ground garlic, salt, pepper, cayenne, cumin, etc.)
Directions:
  1. Preheat the oven to 425 F. Cut a circle around the top of the poblano and tug to remove the stem. If there are still seeds and membrane attached inside, use a skinny knife to slice them off, taking care not to puncture the pepper. 
  2. Heat a small pan to medium and chop the onions and mushrooms into small pieces. Add to the pan with canola oil and saute the veggies for 3 minutes. Add the spinach and continue cooking until it's wilted.Set the pan aside to cool. 
  3. Once the mushroom mix is cooled, spoon it carefully into the poblano (I like to use a little spoon so that I can tamp it down inside!) until it's full to the brim.
  4. Wrap the stuffed poblano tightly in foil, and bake on a cookie sheet for 25 minutes. 
  5. Open the foil, let the pepper sit for 5 minutes, then serve with the slaw (or Mexican rice, guacamole, beans, squash, or a salad!).
Enjoy!

Tips/Suggestions:
- Poblanos are yummy with any stuffing, so feel free to try out as many variations as you want. Here are some iedas for stuffing combinations:
  • Roasted squash, pumpkin seeds, rice, cheese
  • Corn, tomatoes, lean ground beef
  • Rice, beans, cheese, tomatoes
  • Cilantro, garlic, caramelized onions, cheese
  • Ground pork, pine nuts, cream cheese, spinach

Friday, September 23, 2011

Liver and Cheese Sandwich

Liver  is one of those food items that either makes you squeal in delight, or squirm with, well, no delight. For those who fall under the first category of delight, like me, this is the ultimate sandwich to satisfy your liver cravings. It is simple and delicious. The combination of the cheese, pickles, and liver is perfection! If you haven't tried liver té, trust me in saying it's not as scary as it sounds. 


Makes 1 sandwich


Ingredients:
  • 2 slices sourdough
  • 2 tablespoons liver  (I prefer the one with herbs)
  • 6 very thin slices of cheddar cheese (about 1 oz. total)
  • 2 small dill pickles

Directions:
  1. Toast the sourdough if desired. Slice the pickles lengthwise. 
  2. Spread on the té, 1 tablespoon per slice. Top one slice with pickles  and the other with cheese. Assemble the sandwich (ingredients in, this ain't no croque monsieur), cut in half and serve.
Enjoy!
You can also add things like capers, lemon zest, red onion, hot sauce, spinach, tomatoes, etc. to this sandwich, but I prefer the unadulterated version above!

Thursday, September 22, 2011

Easy Salmon Spread

Whenever there is a deal on for smoked salmon fingers at the grocery store, I take advantage just so I can have one thing: this salmon spread. It is amazingly flavorful and if you're like me, you'll be sneaking to the fridge every hour just to try a spoonful. All in the name of taste-testing, of course. Best of all, it's easy, it keeps for 4-5 days (if you can resist it that long), and it's relatively low-cal if you use lite cream cheese!

Ingredients:
  • 1 smoked salmon finger (around 120 g)
  • 3 green onions
  • 4 tablespoons cream cheese
  • salt/pepper to taste (plus any other spices you might want!)
Directions:
  1. In a small bowl, break up the salmon finger with a spoon (make sure there aren't any tiny bones!). Chop the green onions and add them to the bowl. Add the cream cheese and mix it in until everything is evenly coated. Add the seasonings, mix, then cover with plastic wrap and chill for at least 30 minutes to let the flavors soak into each other. 
  2. Serve it however you like: on a slice of sourdough, on top of plain noodles, stuffed into chicken... anything!
Enjoy!

Tip: If you want to use it as a dip, you can add a teeny bit of mayo or plan yogurt to thin it out, bake it at 350 F for 20 minutes and voila!

Tuesday, September 20, 2011

Lazy Chilaquiles

I have this constant need for Mexican food in my life, and it was quite the shock when I moved to Canada's pacific northwest and discovered that Mexican up here is what Chinatown is to Boulder, Colorado. It doesn't exist.

I love love love all types of Mexican dishes, from microwaved quesadillas to chilaquiles.Last weekend I schlepped my Mexican goodies (courtesy of my sister, who sends care packages filled with green chiles and cumin to keep me sane up here) over to the bf's house and we had a fiesta.
I was originally going to make authentic chilaquiles, where you fry up corn tortillas for fresh chips and you top the dish with poached eggs... but I couldn't bring myself to fry anything in someone's own kitchen, so we threw it in a casserole dish and baked it instead. You can always add the poached eggs on top, but we decided to skip it!

Serves 4-6


Ingredients:
  • 1 bag corn tortilla chips
  • 1 small can enchilada sauce
  • 4 wholegreen chiles, canned
  • 1 cup cheese (cheddar, etc.)
  • 4 cloves of garlic
  • 1 jar green salsa
Directions:
  1. Preheat the oven to 400 F and grease a medium-large casserole dish.
  2. Chop the garlic and green chiles. Add to a large skillet over medium heat. Once you can smell the garlic cooking, add the green salsa and let it cook over medium-low heat for about 5 minutes.
  3. Add the chips a few handfuls at a time to the pan and toss to coat with the green sauce, working quickly. Once coated, place them in the prepared casserole dish. You should have roughly three batches of chips to fill a medium-large casserole.
  4. Top the coated chips with one layer of fresh chips, then pour the enchilada sauce evenly over the chips. Top with the cheese, and bake for 15-25 minutes until the cheese is bubbly and golden. 
  5. Serve with your favorite Mexican sides, such a refried beans, corn, sour cream, salsa, and guacamole.
Enjoy!

Quinoa with Pine Nuts and Spinach

Quinoa is a delicious little grain, packed with protein and wholesome goodness. Healthy food doesn't have to be bland or yucky, it can be delicious and addictive! It's just about how you make it...
Here is my favorite quinoa side dish, with some other tips and suggestions at the end for other ways to spice it up!

Serves 2


Ingredients:
  • 1/2 cup quinoa
  • 1 cup water
  • 2 cups packed fresh spinach
  • 1/4 cup pine nuts, raw
  • 1 clove of garlic
  • 1/2 teaspoon lemon juice
Directions:
  1. Preheat the oven to 350. Place the pine nuts on a baking sheet and set aside. 
  2. Rinse the quinoa then add it with the water to a small pot and bring to a full boil. Cover with a lid, turn the heat to low and let it cook for 15 minutes. 
  3. Place the pine nuts in the center of the oven, and toast them for 10 minutes, shaking them halfway through to ensure even toasting. 
  4. Meanwhile, chop the spinach and mince the garlic. Saute them in a medium skillet over low heat so that the spinach wilts and the garlic gets fairly translucent. 
  5. Once the quinoa is finished cooking, mix it into the spinach and garlic mixture. Add the toasted pine nuts and lemon juice to the quinoa mix, toss to combine, and serve.  Serve with salt and pepper so each person can season to taste.
Enjoy!

Tips and Suggestions:
-You will know that the quinoa is done cooking when the little germ thread detaches from the grain.
-Be sure to rinse your quinoa! It has a natural bitter coating so rinsing it will ensure that your dish does not taste off!
-Quinoa is great topped with salsa, soy sauce, chopped herbs, toasted nuts, pesto, lemon juice, raisins, cream cheese dips, anything! My personal favorite is the recipe posted above because it goes with pretty much any cuisine with a little tweaking in the spice department.
-Quinoa has a bit of crunch to it, so simply seasoning it with your favorite spices can be delicious and easy, too!

Sunday, September 18, 2011

Pasta with Prosciutto, Peas and Alfredo

My bf's mom makes prosciutto-wrapped asparagus that is to die for, so on a recent trip to the grocery store I was determined to make some for myself because I was craving it like no other. Seriously, it's one of those foods like corn dogs or peanut m&ms where it cannot be substituted for anything else. I was on a mission. And then the grocery store had no asparagus left! I decided to just throw together a quick pasta because I was starving and the bf texted to say he was starving... I thought I was just going to have a basic meal with some prosciutto mixed in (to get my fix, of course) but I was wrong, oh baby I was sooo wrong! And that is a good thing.

The combination of the intense prosciutto, green peas that pop between your teeth, and Alfredo sauce is divine. And guess what? It's easy as all get out.

Here is the recipe, try not to drool too much when you serve this dish!

Ingredients:
2 servings pasta - shells, rigatoni, etc. (8 oz per person)
2 cups frozen peas
8 slices prosciutto
Alfredo sauce (you can whip it up yourself or use store-bought, your choice!)


Directions:
  1. Cook pasta according to instructions, meanwhile let the peas sit at room temperature while you slice up the prosciutto. I like to cut thin strips, about 1 inch long, but whatever size you desire is fine. 
  2. Once the pasta is done cooking, pour the pasta into a strainer and put the pot back on the stove over medium heat. Add the prosciutto, then after it has crisped up a bit (2-4 minutes) add the peas and Alfredo sauce. Stir for 2 minutes, then turn the heat to low and add in the pasta. 
  3. Mix until each noodle has been coated by the sauce, remove from the heat and serve.
Enjoy!

Suggestions:
Additions such as spinach, sauteed mushrooms, garlic, onion, and even pine nuts are fantastic! This is also great kept for leftovers!
You can use long noodles like spaghetti or angel hair, but small ones that can act as little vessels for the sauce are ideal!

Saturday, August 27, 2011

Basic Vegetable Pie

I love savory pies and tarts, and when you cheat and use store bought crust they are super easy and delicious! You can throw in any combination of vegetables that you crave, so it really is a limitless, easy meal or snack.

The basic essentials are the crust, an egg, and a few tablespoons of cheese, and everything else is up to you!

Ingredients:
  • Crust (pie shell, puff pastry, etc.)
  • 1 egg
  • 3 tablespoons cheese (feta, goat, shredded cheddar, etc.)
  • Vegetables (lightly sauteed to reduce wateriness) 
Directions:
  1. Preheat oven to 400 F. Chop and saute your veggies (combination suggestions are at the bottom of the post!), then spread them over the crust. Beat the egg and the cheese, adding a splash of milk to thin it out if necessary. Pour the egg mixture over the veggies, and bake for 15-20 minutes until crust is deep golden and the filling has set. 
  2. Cool for 20-30 minutes, then serve! 
Enjoy!

Filling combinations:
  • zucchini, mushrooms, garlic
  • jalepenos, corn, green chiles
  • peas, broccoli, garlic, green pepper
  • caramelized onions, mushrooms

Friday, August 19, 2011

Farfalle with Spicy Tomato Meat Sauce

I first had this dish when I was ten years old. My aunt whipped this up at her house, and it was game over for everyone in my family. Best. Pasta. Ever.

We have always called it "farfalle" but that's actually just the name of the noodle we use! You can use the full name that I just made up because I didn't want you to think I just posted on how to boil noodles... or you can just call it Farfalle like I do.

Whatever you call it, prepare to become addicted. Seriously, 10+ years and the deliciousness of this dish has not worn off at all for me!

These are just general guidelines for this dish -- make it your own by adding more or less of any the ingredients to suit your hungry belly!

Ingredients:
Hot Jimmy Dean Sausage (or 16 oz. of ground pork sausage)
1 large can of crushed tomatoes
4 cloves of garlic, finely chopped
1/2 yellow onion,diced
1 green bell pepper, diced


Directions:
  1. Heat a large skillet to medium-high heat. Bring a large pot of water to boil, satl generously, and cook the noodles as directed. Drain them and put them back into the pot with a splash of olive oil.
  2. Add the sausage once the pan is hot, breaking it apart to avoid big clumps of sausage. After two minutes of browning, add in the garlic, onions, and peppers. Cook until the sausage is cooked through, stirring occasionally (roughly 8-10 minutes).
  3. Add the desired spices (dried oregano, basil, pepper, salt, red pepper flakes, etc.) and stir to mix in. Add the tomatoes, cook until heated through.
  4. Pour the meat sauce over the noodles and serve immediately. 
Enjoy! This pasta dish goes great with a mixed green salad or a plateful of asparagus! 

Ways to tweak it: add more or less garlic, ditch the onions for picky eaters, add a teaspoon (or more!) of cayenne to give it extra kick, use regular sausage instead of spicy, add in other veggies like zucchini or corn... anything you like!

Friday, August 5, 2011

Asian-style Ribs

Ribs ribs ribs! The first time I made ribs I baked them in the oven... and I was pretty stressed out by the end of the day because after all of my brushing and basting and slow-cooking, they were a tad dry. There is nothing worse than dry pork ribs! However, last summer I purchased a slow-cooker and ever since then I've never had a worry in my mind about dry ribs. 

If you don't own a slow-cooker, I highly recommend taking the plunge -- I bought mine, a very basic 3 qt. slow-cooker with either low or high settings for about $30, and next time I will lay down the big bucks for a self-shut off and timer. 

You can change up the sauce if you don't like Asian-style ribs, but these are especially delicious alongside Veitnamese spring rolls, salad with sesame ginger dressing, or sauteed veggies with soy sauce.


NOTE: Start making these ribs 7 1/2 hours before you want to serve them! About 7 hours and 15 minutes go to actual cooking time, so just reserve about 5 minutes at the start, a few minutes at the 6 hour mark to fiddle around, and a few more minutes at the 7 hour mark to transfer them to the oven.


Ingredients:
  • 1 rack of ribs (or more, depending how large your slow-cooker is)
  • 1/2 cup soy sauce
  • 1 teaspoon brown sugar
  • 1 teaspoon sriracha
  • 2 tablespoons garlic chili paste
  • 3 cloves of garlic, pressed or finely minced
  • 1 teaspoon of grated fresh ginger (or half teaspoon dry ground ginger)
  • 4 tablespoons sweet chili sauce (or any other asian sauce like hoisin or teriyaki)
Directions:
  1. Cut up the ribs into large sections, and fit it all into the slow cooker. 
  2. In a small bowl, mix the soy sauce, brown sugar, sriracha, garlic chili paste, garlic, ginger and seasonings until combined. Pour over the ribs in the slow-cooker.
  3. Turn the slow-cooker on low heat and let the ribs cook untouched for 6 hours. 
  4. After 6 hours you can rearrange the ribs to get the top ones down into the sauce, making sure to spoon sauce over all of the ribs first. Add more soy sauce if it is getting low. 
  5. Preheat the oven to 450 F and slow-cook the ribs on high for another hour. Transfer the ribs to a foil-lined and lightly greased baking sheet, spreading them out to be in a single layer. Brush the sweet chili sauce over the ribs on the top-side (this is where you can use your imagination and use whatever asian-style sauce you like).
  6. Bake on the top third of the oven for 15-25 minutes, depending on how crisp you want the ribs to be.
Enjoy!

Tuesday, July 26, 2011

Brussel Sprouts with Balsamic Vinegar

You know, growing up I never ate a brussel sprout? Not even one? So when people would complain about them I never really knew what to say because I'd never been subjected to them. Thanks mom and dad. NOT. Maybe they were fed too many brussel sprouts as kids, and maybe they just didn't like them. But I love them.
 My first brussel sprout was on Christmas day in my second year of university, also my first Christmas away from family. My friend's mom served a side dish of brussel sprouts that had been steamed and then quickly sauteed in butter and garlic... I was instantly converted. Since that fateful Christmas day I have tried a few variations of brussel sprouts, and the following recipe is my favorite. The best thing about it is that you can add whatever you want to it and it still tastes delicious... By anything think pine nuts, bacon, goat cheese... think salty goodness. 

I know I just posted a balsamic vinegar recipe, but just keep reading and prepare to say 4 words you never thought you would utter: I love brussel sprouts!


Ingredients:
  • Brussel Sprouts - about 20 (or 5 per person_
  • 1/4 cup balsamic vinegar 
  • Salt, pepper to season at the end
Directions:
  1. Wash the sprouts and remove any ugliness like brown leaves. Slice an X into the base of each little bulb (make sure you don't slice the whole thing apart, you just want to score it!). Preheat the oven to 450 F.
  2. Place the brussel sprouts in a medium saucepan and add enough water to cover them. Put the pan over medium-low heat and simmer for 10-15 minutes.
  3. Once the sprouts are fork tender, spread them out on a greased, rimmed baking sheet. Bake the sprouts for 15 minutes in the top third of the oven, turning once halfway.
  4. While the sprouts are crisping up, put the balsamic vinegar in a small saucepan over medium heat and reduce until it is a thicker consistency, almost like a slightly warmed syrup. 
  5. Remove the brussel sprouts from the oven once they are getting brown and toss them in the balsamic vinegar reduction. Serve immediately and devour them. 
Enjoy!

Cookbook Shoutout

I am slowly expanding my cookbook collection, and I wanted to share the titles that I have (and adore!). Click on the title to see it in its full glory at Amazon :)


Wednesday, July 20, 2011

Basil and Peach Pizza

The universe wanted me to have this pizza for dinner. My sister emailed me a recipe from two peas & their pod that looked so delicious and summer-perfect that I knew I would have to make it soon. Check out the pictures of their Peach, Basil, Mozzarella, & Balsamic Pizza that had my mouth watering and my tummy grumbling! Ooooh weee!

Oddly enough, when I went to the grocery store a few hours after drooling over their blog, all of the piza ingredients were on sale! Okay, Universe, I hear ya! I'll do it! ...

I tweaked the recipe and cheated on the crust... yes, I buy pre-made pizza shells and they are amazing! One time I tried to use store-bought dough, and my BF had to intervene before I had a meltdown because I couldn't roll it out properly. Never again! Well... never again for now :) My version is not nearly as beautiful, but it sure is tasty!

I really hope you try this pizza because it is so yummy!

Ingredients:
  • Mini pizza shell
  • 1 tsp. minced jalepeno
  • 5 large basil leaves, finelychopped
  • 1/2 peach, thinly sliced (unless you can resist eating the other half, in which case you can use the whole peach)
  • 2 tablespoons balsamic vinegar
  • Mozzarella
Directions:
  1. Preheat the oven to 525 F, and heat a small skillet over high heat. Once the pan is hot, add a tiny bit of olive oil and the peach. Cook for about 5 minutes, stirring constantly to make sure everything gets cooked and soft!
  2. In a separate small pan, reduce the balsamic vinegar to about half the quantity over medium-low heat. 
  3. Combine the peaches, balsamic, and basil in a bowl, and mash!
  4. Spread the peach mash on the pizza shell, top with mozzarella, then sprinkle on the jalepenos. Cook in the center of the oven on a baking sheet (or hot pizza stone) for 5 minutes or until the cheese is bubbly and brown. 
Enjoy!!!

Monday, July 18, 2011

Mexican Side Dishes

I love love love love love Mexican food. There is a restaurant in Denver that I have been going to my whole life... My mom started going there when she was in high school and there is a reason it's still around (not that you're old, mommy!). Smothered bean burritos! Green chili! Shredded beef enchiladas! Huevos rancheros! ... and don't forget the Shirley Temple. I swear, it's like root beer and pizza - shirley temples and Mexican food are the ultimate food+drink combination.

Now, it's pretty simple to whip up a mexican main dish (burritos, fajitas, tacos... same basic ingredients, just a different method of putting it all together). Side dishes, on the other hand, are easily forgotten in my experience. Here are some tried and true sides (each with three variations!) for your fiesta.


Guacamole

Ingredients:
  • 2 large avocados
  • 1 tablespoon lemon juice
  • Salt/Pepper to taste
  • 1/4 tsp. dried thyme
Directions:
Halve the avocados, toss the pit, mash with remaining ingredients in a bowl. 

Variations:
  1.  Simple Guacamole: add in 1/4 finely diced red onion, 2 chopped tomatoes, and a dash of cumin.
  2. Spicy Guacamole: add in 1/2 finely diced jalepeno, a dash of hot sauce, and a pinch of cayenne powder.
  3. Loaded Guacamole: add in 1/2 cup corn (you can even sautee them to give a more roasted flavor), 1/4 cup chopped cilantro, and 3-6 roughly chopped slices of pickled jalepeno.


Refried Beans

Ingredients:
  • 1 can refried beans
  • Salt/Pepper/Cumin/Dried Oregano
Directions:
Add the beans to a small sauce pan, cook over low heat until ready to serve, stirring occasionally (5-10 minutes).


Variations:
  1. Drunken Beans: Add 1 can of beer to the beans. 
  2. Spicy Beans: Add 1/2 chopped jalepeno, 3 dashes hot sauce (Cholula!), 1 minced clove of garlic  and oil. Cook on low for 2 minutes before adding the beans.
  3. Veggie Beans: Add a dash of hot sauce, chopped black olives, corn, chopped cilantro, and 1/4 chopped red onion to the beans.


Salsa

Ingredients:
  • 4 large tomatoes
  • 1/2 yellow onion
  • Cilantro
  • Salt/Pepper
  • 2 bell peppers (red, green, yellow, orange, whatever!)
Directions:
Chop all ingredients to the desired size (I like everything to be roughly the same so it all has an equal chance of making it onto a tortilla chip) and mix in a large bowl. Refrigerate :)  This salsa is best when the flavors have had at least 6 hours to meld... The longer you can hold out, the better!!

Variations:
  1. Roasted Salsa: Preheat oven to 450. Chop all ingredients and put all except cilantro in a 9x13 pan with a drizzle of oil on top. Roast for 20+ minutes, or until tomatoes are starting to wrinkle and your oven smells like heaven. Let the veggies cool, then puree them with the cilantro in your blender.
  2. Sweet and Savory Salsa: Add diced mango/pineapple/apples. Any and all are great additions!
  3. Garlicky Salsa: You guessed it.. add garlic! You can lightly toast it first, sautee it in oil to infuse the flavor even more, or add it in raw!

Sunday, July 17, 2011

Pork Tenderloin Stuffed with Rosemary Panko

I first came across a stuffed pork tenderloin recipe a year ago (that I for some reason have never been able to find again) that changed the way I think of tenderloin forever. I always thought it was a dry piece of meat that was meant to be a vessel for gravy and nothing more. Hahaha silly me I was soooo wrong!

I have stuffed pork tenderloin with couscous and caramelized onions, italian breadcrumbs and sage, and finally, panko and rosemary. While these have all been delicious, my BF has decided that this week's tenderloin was one of his favorite meals I have ever made, so that's the recipe I'll share!

Feel free to tweak the recipe in any way you see fit! You can quickly toast the breadcrumbs/panko, you can stuff it with cranberries or apples, you can give it a nice pepper crust, you can do anything!!!


Ingredients:
  • 1 pork tenderloin
  • Fresh rosemary
  • Olive oil
  • Acid for marinade (I used some of the juice that my pickled jalepenos are in, but you can use lemon juice/apple cider vinegar/orange juice/etc.)
  • 1 cup Panko breadcrumbs
  • Salt, pepper
  • Twine/Toothpicks to fasten the stuffed tenderloin for baking
Directions:
  1. In a ziploc bag, put the tenderloin, about 10 leaves of rosemary, salt/pepper to taste, and 1 part acid to 2 parts oil. Marinate this for at least 24 hours. Do not cut corners! This is where all the magic happens and the longer your tenderloin marinates, the juicier it will be at the end. 
  2. The next day, preheat the oven to 350 F.
  3. Finely dice 10 more fresh rosemary leaves. Mix it with the panko, salt/pepper (and other seasonings if you want) in a small bowl.
  4. Slice the tenderloin like a hot dog bun - lengthwise and not all the way through! Using your hands, put the panko mix in the slot and then use kitchen string to tie it closed (4 pieces looped around each end and a quarter of the way in on each side). Toothpicks also work, they are just more work later to get out :)
  5. Roast the tenderloin on an ungreased baking sheet in the middle of the oven for 45 minutes, turning halfway through to ensure even browning. Remove the kitchen string (or toothpicks) before serving!
Enjoy!

P.S.  This goes great with "Thanksgiving-style" dishes like mashed taters and squash, as well as simple sides like peas and spinach.

Saturday, July 9, 2011

Roasted Chicken

This is the perfect roasted chicken for a weekend meal! I love dishes that provide enough for leftovers so that I can have easy meals the next few days. Roasting a whole chicken is great because you can use leftovers in so many ways! If you leave meat you can have chicken sandwiches, add it to pasta, roll it into a wrap! Keep the bones and you can make your own chicken stock or even your own chicken noodle soup! Oh the possibilities are endless with a roasted chicken... who doesn't love that?

This chicken has a crispy skin with juicy juicy meat on the inside, and it's really easy to prepare. I like to marinade my chicken for at least 6 hours, preferably a full 24 hours for maximum flavor. Trust me, the marinading is key!

Here is what you need for a perfect roasted chicken.....

Ingredients:
  • Whole raw chicken (2-3 pounds)
  • Olive oil/Canola Oil
  • Salt/Pepper/Seasoning (I use an Italian blend)
  • Fresh Rosemary
Directions:
  1. Put the chicken into a large ziploc bag, and add the oil and spices -- be generous with the spices! Get your hand in there and rub it all over the chicken, then after washing your hand with scalding water because raw chicken is bad bad bad, close the bag and refrigerate for 6-24 hours.
  2. Preheat the oven to 450 F, and put the chicken in a roasting pan. Stuff the cavity with the fresh rosemary and bake the chicken for 15 minutes. 
  3. Reduce the heat to 375 F and bake for and additional 50-60 minutes, or until the juices run clear when the chicken is pierced with a fork.
  4. Remove from the oven and tent with foil. Let the chicken rest for 15 minutes before carving and serving!
Enjoy!

Suggestions:
- My BF's mom adds a whole lemon to the cavity of her chicken before she roasts it, which adds a subtle lemon flavor and adds to the juiciness!
- Stuff rosemary stalks under the skin of the chicken before roasting, just remember to remove them before carving!
- Squeeze some lemon juice into the marinade bag to tenderize the chicken even more and add lemon flavor!
- Put peeled garlic cloves into the cavity before baking for a garlic flavored roast chicken

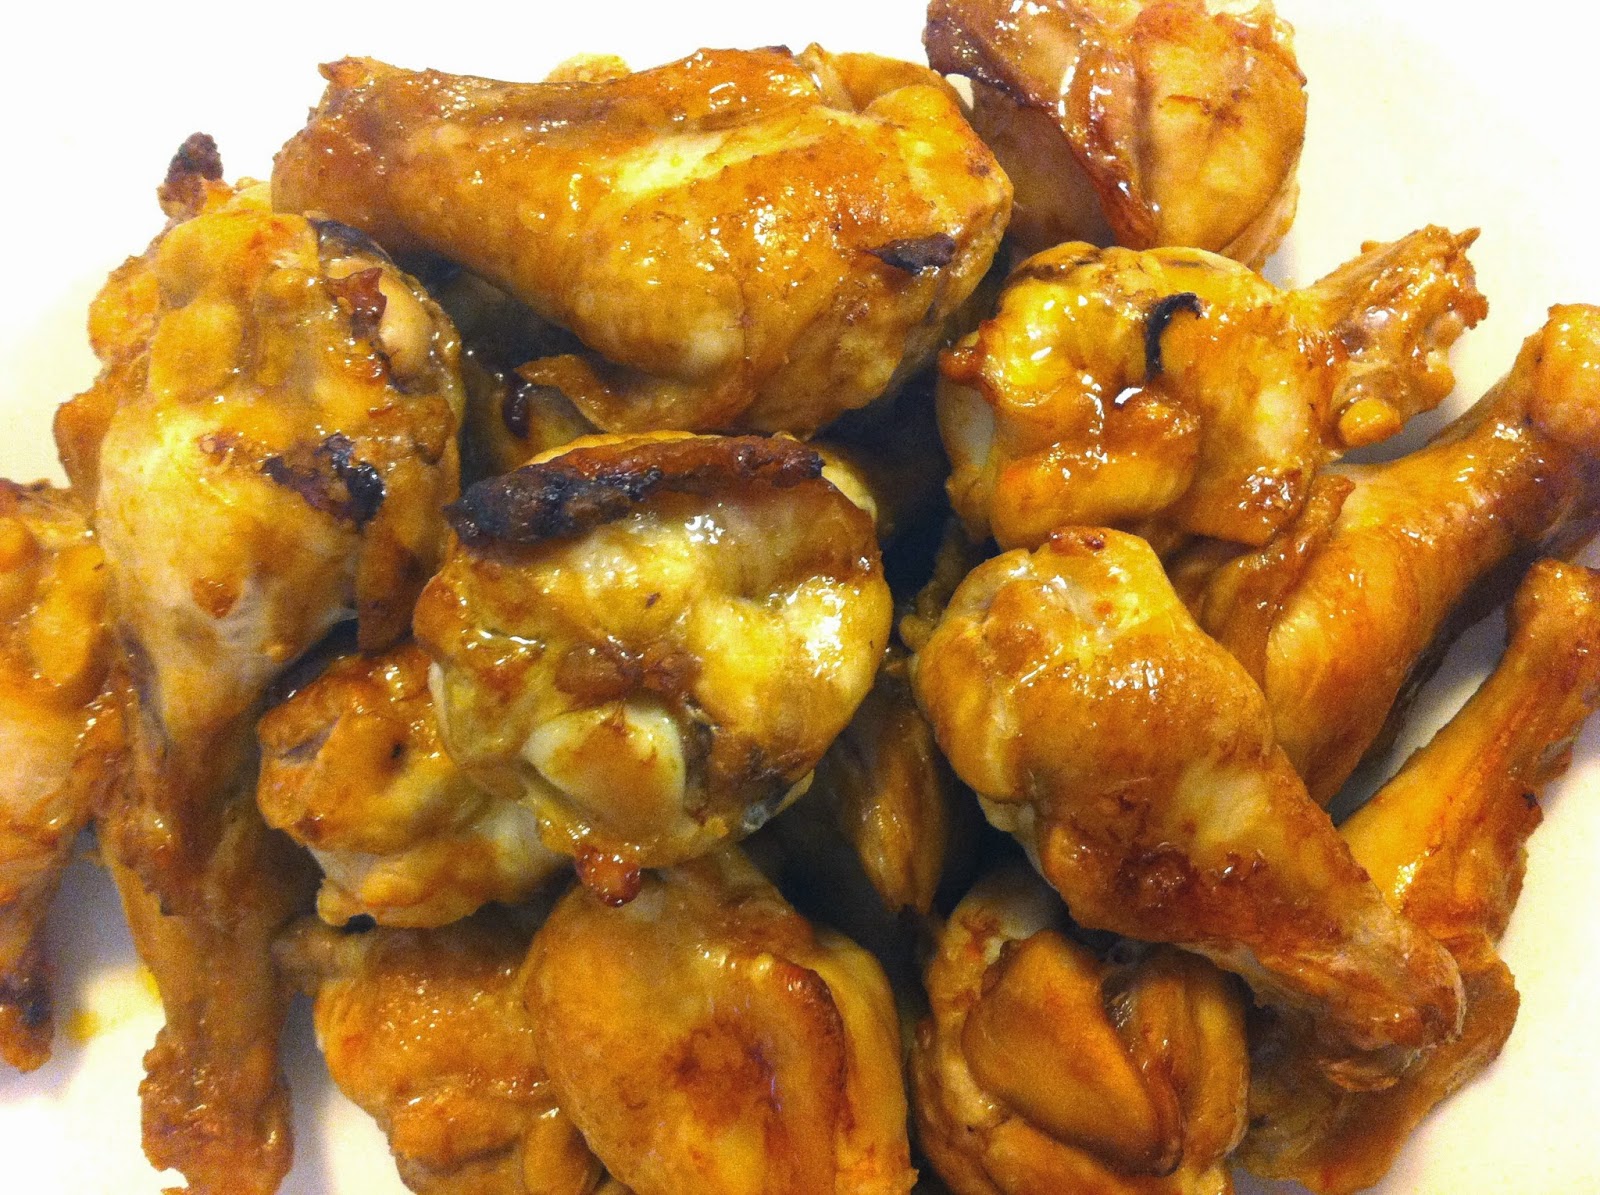
Baked Chicken Wings


Football season is here, and that means football party foods are recirculating.  This recipe requires very little effort and attention, which makes for excellent party food.  These are also not breaded or deep fried, keeping them on the healthier side of things which is always nice when football parties are usually laden with fatty or fried foods. The icing on this proverbial wing cake is that while it requires the same 3 ingredients, you can adjust the amounts to suit your preferences every time: barbeque, Frank's hot sauce, soy sauce. Also, if you want a less saucy wing you can marinade the wings in a ziploc back, then remove them from the sauce before baking. Alternatively, you can also reserve a portion of the sauce when you first whip it together to toss the wings in post-baking (don't re-use the marinade that the raw chicken sat in). You see? The possibilities are endless.

Ingredients:
  • Wings 
  • Barbeque Sauce
  • Soy Sauce
  • Hot Sauce (Frank's)
Directions:
  1. Preheat oven to 400 F, and grease 1 large rimmed baking sheet. 
  2. Combine the sauces in any ratio you prefer to make about 3/4 cups of sauce per 30 wings. 
  3. Toss the wings in the sauce in a large bowl, then pour onto the prepared baking sheet. Spread the wings so they are in a single layer, and bake for 20 minutes in the middle of the oven. Flip them, and bake another 20 minutes.
  4. Using tongs, transfer the wings to your serving dish and let them sit for 2-4 minutes before serving so you don't burn your fingers off!

Monday, July 4, 2011

Tofino Fare

I just got back from a vacation in Tofino (one of my favorite places in this planet) and I find myself disappointed in my fridge items after all of the delicious meals I had this weekend... I look forward to the food in Tofino every year, and it was especially tasty this Canada Day weekend!

Shelter Restaurant
Smoked Salmon Plate (shared among 4)
Oysters
Meares Island Chowder
Chevre Cheesecake
                                   Apple Pie with Homemade Vanilla Ice Cream 

I had been talking about how I was probably just going straight for dessert, but once we got the restaurant the BF's family convinced me to put a little bowl of chowder in my belly to even things out... I have had the chowder before, and it never fails to please my palate!!! The smoked salmon and clams are abundant and smooth.I really liked the Chevre Cheesecake which was topped with a blackberry compote. I expected the goat cheese to be really mild and hardly noticeable, but it was really intense. I like goat cheese, and it wasn't a very sweet cheesecake which gave it bonus points in my opinion. The apple pie was classic, except the apples were sliced paper thin which gave it a very different texture-- very light and not as gummy as classic pie. The vanilla ice cream is something that I normally don't go crazy for, but it had a very rich vanilla flavor that I liked.

Sea Shanty
Shanty Pizza with Chicken and Onions

I ordered the Shanty Pizza, which is just a cheese pizza with a house marinara, so I added chicken and onions. The marinara sauce was obviously fresh because of the rich tomato taste, and the chicken and red onions were juicy and cooked inside a layer of the cheese so they stayed put. It was honestly the best pizza I have ever had! The crust was not too thick, not too think, corn meal on the bottom for crunch, fresh marinara, sharp cheese... ahh I'm so hungry just thinking about it!

Wicaninnish Inn Restaurant
Linguine with Smoked Chicken in a Pesto Cream Sauce
 Mai Thai

This dish was the chef's special, and it was everything I imagined and more. Normally I can't finish any pasta plate I order, but I inhaled this and had to make a conscious effort to save a bite for the BF. I am definitely going to try to recreate this dish during the week! Also, they had Mai Thai's on special, and this one was the yummiest I've had since I was slurping one out of a bucket in Bangkok (it was more glamorous than it sounds).

I also have to mention that my BF got the Wicked Bagel: smoked salmon cream cheese, prawns, shaved cucumbers, capers.... ooh it looked divine! He ate it so quick I looked back to beg for a nibble and it was gone!

 ......................................

And this is not a restaurant meal, but on our last night we bought 2 crabs from a guy selling them out of the back of his truck and had surf n' turf! We boiled the crab and dipped the meat in drawn butter (we called it "budda", it made a difference in the experience), which we ate as an appetizer about 30 minutes before we threw 4 t-bone steaks onto the grill.  We each had 1/2 crab and a t-bone steak, and it was the perfect amount for a long, drawn out dinner. The BF's mom roasted asparagus in the oven and cooked up some rice, which we ate as sides with the steaks. All she did to prepare the t-bones was to brush olive oil over each and sprinkle salt and pepper on top... mine was cooked beautifully to medium rare, and it was such a treat! If you ever get your hands on fresh crab in Tofino, I highly recommend having a lazy picnic dinner with it!
Friday, June 24, 2011

Oatmeal with Peanut Butter

I'm not a big breakfast food person. Sometimes I whip up a batch of banana muffins or waffles for the week, but I don't usually have a sit-down meal i the morning. I would rather eat steak and potatoes or spaghetti when I wake up, but recently I've been into oatmeal (instant, sue me) with a tablespoon of peanut butter mixed in. Yum.

Most simply, delicious, flavorful, and filling breakfasty-breakfast I've had in a while!

Ingredients:
  • 1 packet instand oatmeal
  • 1/4 cup hot milk or water
  • 1 tablespoon smooth peanut butter
Directions:
  1. Mix all ingredients in a bowl and eat up! 
Enjoy this simple breakfast!

Thursday, June 23, 2011

Chicken Stiry-Fry with Easy Cocount Curry and Rice

I went out on a limb last night when I made dinner for myself and the BF - I made a curry dish. The BF is not a fan of anything curry, and he really does not like savory-sweet meals. He likes Chinese, Japanese, Vietnamese... Indian? No. Middle Eastern? No. So when I was secretly pouring coconut milk and teaspoons of curry powder into our stir-fry, I was praying to the food gods that he would like it. And guess what? He liked it! Woohoo! This means I can now start making samosas and Indian-style cuisine when he's around.

This was incredibly easy to whip up! I happened to have all of the ingredients on hand which made it even easier.

Ingredients:
  • 4 boneless, skinless chicken thighs (or 1 small chicken breasts)
  • 2 cloves garlic
  • 1/4 yellow onion
  • 2 stalks of green onion
  • 1 small head of broccoli
  • 4 stalks of asparagus
  • 6-8 mushrooms
  • salt/pepper/dried basil/bay leaf
  • 2 tablespoons curry powder
  • 1 cup frozen peas 
  • 1 can coconut milk
  • 4 cups cooked rice
  • Optional: Sriracha for extra spice
Directions:
  1. Heat a large frying pan over medium heat. Chop all of the veggies (expect peas) into 1/2 to 1 inch chunks. Slice the chicken into 1/2-inch-thick slices. Add all ingredients except the last 4 ingredients to the pan and cook until chicken is browned, stirring occasionally. 
  2. Add the peas and coconut milk to the stir-fry. Turn the heat to low, then simmer for 25 minutes.
  3. Taste the curry, then add seasonings as necessary and sriracha if you want it hot!
  4. Serve over warm cooked rice, making sure to scoop some of the sauce from the pan onto your rice!
Enjoy!

Wednesday, June 22, 2011

Bangers and Smashed Taters

When I first came to Canada, I hadn't had things like perogies, poutine, or bangers and mash. Ever. Of course, by now I'm a seasoned pro when it comes to all three dishes, but I prefer a twist on bangers and mash that I call Bangers and Smashed Taters. Same general ingredients, totally amped up flavor. Don't get me wrong, I love mashed potatoes---especially my sister's crockpot mashed taters! But a little crispiness on taters adds wonderful texture to this yummy meal.

I usually serve these with an undressed piled of mixed greens or steamed veggies like broccoli or asparagus, and caramelized onions when I'm feeling wild. The sausages and potatoes are so rich that you'll want to have a plate that is mostly filled with veggies to balance it out.

Serves 2

Ingredients:
  • 4 Bangers - English-style sausages
  • 12 baby gold potatoes
  • 1 tsp. olive oil
  • fresh rosemary (or 1/4 tsp. dried)
  • 1/4 tsp. dried thyme
  • salt/pepper/cumin/cayenne for seasoning
Directions:
  1. Preheat oven to 400 F. Lightly grease a baking sheet and set aside. 
  2. Put the potatoes in a medium pot and cover with water. Boil for 30 minutes or until tender when pierced with a fork. 
  3. Finely chop the rosemary, then mix it in a small bowl with the thyme and other desired seasonings.
  4. In another pot, place the bangers in and cover with water. Boil for 20 minutes.
  5. When the potatoes are finished, drain and place on the prepared baking sheet. Using a potato masher, lightly crush each potato (they shouldn't be smashed completely, just enough to make each blossom open). Brush each potato with olive oil then sprinkle on the mixed seasonings. Bake for 15-20 minutes, or until the potatoes are golden-brown. 
  6. Meanwhile, drain the bangers but put them back in the pot at low heat, and add 1 tsp butter or olive oil spread to brown them. Put a lid over them until the potatoes are done and you are ready to eat!
Enjoy!

Monday, June 20, 2011

Veggie Sandwiches with Goat Cheese and Pesto

The summer before I set off for university (yikes, 4 years ago!) I often invited friends over for mini dinner parties and craft nights. My mom went on an adventure to Africa for 2 months, so I was in Colorado keeping the fort. It wasn't a lonely time, rather it was a summer filled with creativity and exploration--most of which happened in the kitchen and in front of a canvas.

Luckily, I had some amazing friends by my side that summer who also wanted to have picnics and fly kites at Chitaqua Park, paint huge canvases together, go camping in Nederland, test vegan cookbooks, drink bubble tea with our feet dangling into the Boulder Creek, and all-around have a wonderful and light-hearted summer.

That summer, there was one recipe that was requested over and over by both my vegetarian and meat-lovin' friends. Veggie Sandwiches.  It's a perfect mix of veggies, cook until soft and juicy, on tangy sourdough bread smeared with goat cheese and pesto.... oh my. So good. Soooo addictive. Beware the Veggie Sandwich.

Recipe is good for 2 sandwiches, but you should buy enough ingredients to make 4-6 because you will want another one soon!

Ingredients:
  • 1/2 yellow onion
  • 1/2 red bell pepper
  • 1/2 green bell pepper
  • 4 cups fresh baby spinach
  • Salt/Pepper/Cumin/Garlic Powder
  • Sourdough Bread (4 slices)
  • Goat Cheese
  • 2 tablespoons Pesto
  • Optional: Roasted Red Pepper spread (Sundried Tomato)
Directions:
  1. Slice the onion and peppers into thin strips. Preheat a skillet to medium-high heat, then add a splash of olive oil. Immediately add the onion and peppers. 
  2. Meanwhile, toast the slices of sourdough. Smear 1 tablespoon of pesto on two slices of the bread, then smear some goat cheese on the other slices of bread... get it? Each sandwich will have 1 side pesto, 1 side goat cheese. If you have (or want) to add some roasted red pepper spread to the goat cheese sides, you can do so now.
  3. The onions and peppers should be soft and slightly blackened by now. Add the spinach to the veggies and add 2 tablespoons of water. This will steam and wilt the spinach, so don't worry about how full the pan will be at first. 
  4. Add the salt, pepper, and cumin to the veggie mix to taste. Scoop half of the mix onto a goat cheese-smeared slice, then top with a pesto-smeared slice. Repeat for the second sandwich. Eat right away because the juicy veggies will soak the bread if you leave it too long!
Enjoy!

PS - you could add sliced chicken or bacon or sausage to this sandwich, but  I can assure you that meat-lovers will not miss a thing.

Wednesday, June 15, 2011

Caramelized Onion and Goat Cheese Tart

These are perfect for cocktail parties, appetizers, and quick snacks. I personally find them yummiest after they have been sitting at room temp for over an hour, so that the flavors have time to meld post-bake. This is a recipe that can be tweaked in many ways! Add a little crumbled Italian sausage or bacon for a meat-lover, or alternatively throw on mushrooms or sliced figs to keep it vegetarian.

These recipes will fill 4-6 people (depending on how much you eat...)

Caramelized Onion and Goat Cheese Tart

Ingredients:
  • 2 onions
  • 1 tablespoon of butter
  • 1 sheet of puff pastry, thawed
  • 1/2 cup goat cheese
  • 1/2 cup cream cheese
  • 1 egg
  • Dill/salt/pepper/?
Directions:
  1. Preheat the oven to 400 F, and put a skillet (that has a lid that will fit!) on medium heat.
  2. Slice up the onions into thin rings and throw into the skillet. Add butter and put the lid on the pan. The moisture from the onions will steam them and get them all juicy and caramelized! At this point you can also add a tablespoon of brown sugar, but I think that the onions get plenty sweet on their own! Let the onions cook for 20 minutes on medium low, stirring occasionally. You will know that they are done when they are deep brown and no longer have that spiciness to their smell! 
  3.  While the onions are cooking, mix the remaining ingredients in a small bowl. I used dill/salt/pepper as my seasonings, but you can add whatever spices you prefer! I mean, onions are used in pretty much every cuisine so you can't go wrong!!
  4. Roll out the puff pastry into a rectangle, roughly the size of a cookie sheet (no worries about being perfect, no one is going to be thinking about the shape of this baby as soon as they have a bite!). Place the dough on a large cookie sheet, and spread the cheese mixture over it. I rolled up the edges of the rectangle to make a mini crust, but if you want more real estate for cheese and onions you can skip it.
  5. Remove the onions from the heat once they are finished cooking, and using a spoon or some clean and heat-proof fingers plop the onions evenly over the tart. 
  6. Place the tart in the middle rack of the oven and cook for 25-30 minutes. The crust should be golden, and the cheese should no longer look glossy. 
  7. Remove from the oven and let cool for 5-10 minutes. Cut into 12 squares (4x3) or any shape your heart desires! 
  8. You can serve these warm, chilled, or room temperature (my personal favorite!). 
Enjoy!

Boston Baked Beans

When I graduated from university at the end of April, my family came from Colorado to visit. They loaded me up with cans of green chile, Mexican seasonings, enchilada sauce and beans. I love Mexican food, and let's just say Canada does not know how to do Mexican cuisine so it is always a pleasure when I get a care package from la familia filled with food, especially Mexican food!

Well, then my mom handed me a bag of Great Northern Beans and a card from my aunt and uncle in Arizona. At first I didn't understand the connection, but upon reading the card I found two recipes: one for classic Boston Baked Beans and one for my Grandma's Bean Soup! So exciting because I associate baked beans with growing up and visiting my grandparents' house. My sister and I often spent weekends and portions of summers there, playing hide-and-seek in the house, eating mulberries in the yard, and searching for hidden boxes of Russel Stover's chocolates. I have a large family, and summer "get-togethers" were quite frequent. All family barbeques (or so my memory tells me) included some variation of potato salad and a pot of baked beans, so I require both dishes throughout the summer to keep myself normal.

Thanks to my lovely aunt, I now have a recipe for baked beans that I can rely on!

Ingredients:
  • 1 lb. cooked great northern beans
  • 1/2 cup molasses
  • 1/4 lb bacon, cubed
  • 1 teaspoon salt
  • 1 tablespoon mustard (hot or mild)
  • pinch of pepper
Directions:
  1. Mix all ingredients and pour into a casserole dish. Add enough hot water to cover the beans. Bake covered at 350 f for 3 hours, stirring occasionally. 
  2. Uncover and cook til it has achieved the desired consistency.
Enjoy!
PS - Keep an eye out for grandma's bean soup!

Tuesday, June 14, 2011

Upside-Down Chocolate Pudding Cake

I grew up on all sorts of variations of this yummy and easy dessert, and each one has been delicious... In May I went to the Times Colonist book fare in Victoria, and I nabbed quite a few old-school cookbooks.

One of these was a 1972 Betty Crocker cookbook, and in the middle of the pudding section I came across yet another variation of the pudding cake I love, titled "Hot Fudge Pudding Cake". This version had less cocoa than I was used to and it asked for shortening instead of butter... oh, the good old days of shortening-only baking and cooking. I can't remember the last time I saw something on a modern food blog or cookbook from the last ten years that called for shortening and didn't add a blurb to justify it or offer a substitution... After poking around online, I found an updated Betty Crocker version of the recipe that is almost identical to the one I have written down in my recipe binder. Of course. My secret family recipe is actually Betty Crocker. That's always a fun realization.

This upside-down pudding cake is glorious because as it bakes, it becomes 2 layers of chocolaty  goodness: pudding and cake. And it's extremely easy to prepare. And extremely easy to devour in one sitting.


Ingredients:

Cake
  • 1 1/4 cup flour
  • 1/4 cup sugar
  • 1/3 cup cocoa powder
  • 1/2 teaspoon salt
  • 1 1/2 teaspoon baking powder
  • 1/2 cup milk
  • 2 tablespoon melted butter
  • 1 tablespoon vanilla
Pudding
  • 1 cup brown sugar
  • 1/4 cup cocoa powder
  • 1 1/3 cup boiling water
Directions:
  1. Preheat oven to 350 F. In a bowl mix all of the dry cake ingredients, then add the butter, vanilla, and milk. Mix until combined and spread into a 8x8 or 9x9 pan. 
  2. In a separate bowl, mix the first two pudding ingredients. Sprinkle the sugar mix over the batter in the pan, then pour the boiling water on top. Bake immediately for 40-50 minutes, until cake is set and not jiggly. Serve hot. 
Enjoy! 

PS - You can serve this pudding cake with ice cream or, my favorite, a few spoonfuls of dulce de leche!

Fried Bananas and Whipped Cream

When I was 6, my family took off to Central America for six months. At the time, I was under the impression that months and years were the same thing so I was a bit nervous at the prospect of leaving home for 6 years.... but after learning the difference between months and years and experiencing the pure joy of travel, let's just say I love my parents for deciding it was a good idea to quit their jobs, rent out their house, and move to a place we'd never been before. Not to mention the whole Spanish language thing.

Anyway, I can remember eating fried plantains with whipped cream, and later that week someone in the house was a genius and decided to use bananas to recreate that dish... I have never been a fan of plantains unless they are smothered in green chili and beans, so putting them into a sweet dessert didn't hit the spot. Bananas fried in butter, however, are pure magic.

This is probably the simplest dessert you can imagine, and if you buy a can of whipped cream rather make your own it is even easier to whip up. Ha. Ha. Whip up. 

Ingredients:
  • 1 banana - you want this more on the green/yellow side than deep yellow
  • 1 tablespoon butter
  • Whipping cream - pint
  • 1 tablespoon sugar
  • 1 teaspoon vanilla
Directions:
  1. Pour the whipping cream into a large bowl.  Blend on high until it becomes fluffly but peaks do not form. Add the sugar and vanilla, then continue to whip until soft peaks form. Be careful not to over-beat because you will make butter if you go to far :)
  2. Heat a skillet over medium heat. Slice the banana lengthwise into 1/2 inch thick strips. Add the butter to the pan, and coat the bottom. Add the banana slices and cook until browned, then carefully flip over and brown the other side. 
  3. Serve hot with a plop of whipped cream on top.
Enjoy!

Creamy Pasta with Bacon, Asparagus, and Mushrooms

One thing you are pretty much guaranteed to find in my fridge at all times of the year is a bundle of asparagus. Asparagus sneaks its way into pretty much everything I make, from pizza to spring rolls, sandwiches to quesadillas, pasta to salads.... I love it. And luckily, so does the BF so I don't get any complaints about having asparagus for the hundredth time this month.

I don't usually buy bacon, but this week it was on sale and all of a sudden I was salivating. I had to have bacon in my life right away.

I had just a few mushrooms, a few stalks of asparagus, and a couple slices of bacon left in my fridge which suddenly added up to be my decadent dinner the other night. This pasta is quick and easy, super-rich and yummy... pretty much the best pasta I've had in a while.


Ingredients:
  •  4 mushrooms
  • 3 stalks of asparagus
  • 2 slices of bacon
  • 1 cup pasta (shells or rotini)
  • Alfredo sauce (I cheated an used a jar, but you can make it from scratch!)
Directions:
  1. Heat a medium skillet over medium heat. Slice the mushrooms, cute the asparagus stalks into quarters, and chop the bacon into small pieces. Add to the skillet and cook until the bacon is crisp. 
  2. Meanwhile, cook the pasta in a medium pan and drain it. Put the pasta back into the pan for later. Prepare a plate lined with paper towels or napkins for the bacon mix.
  3. Once the bacon is fully cooked, use a slotted spoon to transfer the bacon and veggies to drain on the prepared plate. Add the desired amount of alfredo sauce to the pasta, and turn onto low heat. Add the bacon mixture, stir until the pasta is heated through. Serve warm!

Enjoy!

Beef Stroganof

WARNING: Man-Friendly Meal.

When I asked the BF if he wanted beef stroganof for dinner a few days ago, he told me he'd never tried it. That made my heart a little bit sad because I feel like beef stroganof is such a classic meal that never needs updating! Plus, for a guy who doesn't eat anything with tomatoes, beef stroganof could be a dream come true.

The best thing about this recipe is that you can eyeball all of the ingredients, so don't worry about exact measurements and just go with what feels (or tastes) good.

This made enough for 6 servings

Ingredients:
  •  1 lb. chuck, or stewing beef
  • 4 cloves of garlic
  • 1/2 yellow onion
  • 15 brown mushrooms
  • 1 box beef broth
  • 1/2 cup sour cream
  • Salt/Pepper
  • 3 tablespoons butter or olive oil spread
  • 4 tablespoons flour
  • Uncooked pasta (I like shells or rigatoni so the sauce gets scooped into every bite)
Directions:
  1. Heat a large, deep skillet over medium-high heat. Cut the chuck into 1/2 inch thich strips, and add to the pan. Brown, then set aside on a plate. 
  2. While the beef is browning, chop the garlic, onion, and mushrooms. Leave the mushrooms in relatively large chunks. Add the veggies into the pan after you've removed the beef, and reduce the heat to medium. Cook for 5 minutes, then add 3 cups of beef broth and the cooked beef to the pan. Add the butter and flour, stir to combine, then reduce the heat to medium-low so the mix can simmer.
  3. After 10 minutes of simmering, add the sour cream and seasonings. At this point, if the sauce is super wet, add more flour. If it is very thick, add more broth. Like I said, eyeball it!
  4. Let the sauce simmer for 30 minutes (or more!) then turn off the heat. Boil the noodles as desired, then add to the sauce and mix. Serve hot!
Enjoy!

Thursday, June 9, 2011

Loaded Nachos with a Homemade Cheese Sauce

I love all foods that belong on a pub menu. Nachos. Burgers. Fries. Hot dogs. Pot pies.
The BF is a kindred spirit, so we often have dinners that consist of hot dogs and nachos, or dips and bacon-wrapped jalepenos, or wings and tacos... We obviously go high-class 24/7!

I am not one to maintain a strict diet (unless it consists of pastries and coffee), and these nachos are one of my favorite Ultimate Splurge foods. Take a deep breath, read the ingredients, and go for it! I promise you, these nachos are worth the zillion calories they contain.

Ingredients:
  • Tortilla chips (blue corn are the best!)
  • 1 jalepeno
  • 5 slices of bacon
  • 1 can olives
  • 4 stalks of asparagus
  • 5-6 medium mushrooms
  • 1/2 small onion
  • 3 cloves garlic
  • 2 1/2 cups shredded cheese, separated (sharp cheddar is my favorite)
  • 2 cups milk
  • 2 tablespoons flour
  • 2 tablespoons butter or olive oil spread
  • Salt/Pepper/Miscellaneous Spices (cumin, oregano, parsley, cayenne, etc.)
  • Sriracha (optional)
Directions:
  1. Preheat the oven to 375. Heat a large skillet over medium heat and lay the strips of bacon in it immediately. 
  2. While the bacon cooks, start chopping up the jalepenos, olives, asparagus, mushrooms, onion, and garlic. Cook the bacon until crisp and remove from the pan. Pour out the grease but leave just a teeny tiny bit (like a teaspoon coating the pan) in it.Once the bacon has cooled enough to handle, chop into pieces.
  3. Add the chopped ingredients to the pan and saute over medium heat for 5-10 minutes, until the asparagus is slightly crunchy and the onions are translucent. Take pan off heat when everything is cooked but leave all of the toppings in it, and mix in the bacon pieces.
  4. In a separate pan, heat it to medium-high heat. Add the butter until it is bubbling, then add the flour and whisk it together. Once the flour is golden, add the milk and 2 cups of cheese and whisk constantly for 5 minutes or until it has thickened. Season the cheese sauce with salt. pepper, and any other spices you desire. At this point I usually add a few drops of sriracha for extra heat, but you can choose to leave it out. 
  5. Prepare a large baking sheet with one layer of chips, then use a spoon to drip 1/3 of the cheese sauce over the chips. Scatter 1/3 of the toppings, then repeat the layering 2 times to have 3 layered nachos. It is important to have the cheese sauce down first so the toppings stick to the bottom layer rather than clump to the layers above! 
  6. Sprinkle the remaining cheese over the nachos and bake in the oven for 10-15 minutes, until the cheese is bubbling. 
Enjoy! 


PS If you're feeling extra naughty, feel free to serve these with a drizzle of sriracha on top, or with a side of salsa. I'll be honest - salsa is overkill because these nachos are packed with juicy flavor!

Wednesday, June 1, 2011

Italian Sausage and Ricotta Ravioli

I know I start every post with how much I love some type of food, and in case you haven't noticed, I happen to love pretty much ALL food... But really, I have no limit to the amount of sausage I could eat. Yeah yeah, you can giggle. But I'm being serious when I say I love summer, polish, italian, beer, brats, maple, breakfast, chorizo, bangers, smoked, farmer's... sausage.

Personally, I think pasta is at its best when paired with a spicy grilled Italian sausage, so when I was trying to decide what to fill my ravioli with I remembered that I had a stockpile of sausage in the freezer. I also had a tub of ricotta, so I set out to make sausage and ricotta stuffed ravioli.

Now, I learned through trial and error that while the ravioli can withstand 3 minutes in boiling water like most Google searches recommended, they are best at 45 seconds of boiling time... trust me.

This provides enough food for 3 regular portions, or like we did, 2 huge portions (food baby anyone?)

Ingredients:
  • 1 spicy Italian sausage
  • 2 cloves of garlic
  • 1/4 onion
  • 2 cups ricotta
  • Wonton wrappers
  • Water bowl for sealing
  • Sauce of your choice (recommend: marinara or a spicy alfredo)
Directions:
  1. Put a large skillet over medium heat. Split the sausage and discard the skin, breaking the sausage up in the skillet. 
  2. Roughly chop the onion and garlic and add to the sausage. Cook for 10-15 minutes, until the sausage is browned and the onions are translucent. 
  3. Transfer the sausage mix into a medium bowl and add the ricotta. Using an immersion blender, blend the mixture so that the sausage has been broken down into fine pieces. You may add salt/pepper or other seasonings at this time. This can also be done in a food processor!
  4. Drop a teaspoon of the mixture in the center of a wonton wrapper, then  dip your finger into the water and run along the edges of the wrapper. Fold one corner to the opposite to form a triangle - make sure to pinch the edges to completely seal the ravioli. 
  5. Place the ravioli on a baking sheet, and repeat until filling runs out. If you need more space to set the ravioli, just place a sheet of plastic wrap on top of the prepared ravioli and start a new layer. 
  6. You can bring water to boil as you get to the end of this process, or you can cover the filled ravioli with plastic wrap and store in the freezer until you're ready. 
  7. Cook the ravioli in batches, 45 seconds for "fresh" ravioli, or 90 seconds for frozen. Toss gently with the sauce of your choice and serve immediately.

Enjoy!

Barbeque Chicken Sandwiches

I really really really love all things barbeque sauced. Yes, bbq SAUCED. I usually go straight for a bbq pizza, but since I was in the mood for a sandwich I made a barbeque chicken sandwich! That's my brain working. No big deal.

I like lots of flavors in my sandwiches, unlike the BF who just likes ham, cheese, and butter on his bread... Tonight I'm a free woman and I've loaded this sammy with all the goods. Of course, you can get even more wild by adding jalepenos or hot sauce, or you can go the other direction and skip the veggies altogether for an unadulterated bbq chicken sandwich.

Also - you may notice that I didn't slather the bread with anything like mayo, and I also didn't add cheese... I find that the bbq sauce is plenty saucy for this sammy, and the creamy avocado more than satisfies any cheese cravings you may have.

This makes enough for 2 little sandwiches or one semi-big one.

Ingredients:
  • 2 boneless, skinless chicken thighs 
  • Salt/Pepper/Olive oil for cooking
  • 4 slices of tomato
  • 1/2 avocado, sliced
  • 1 small onion
  • sandwich bread
  • bbq sauce
Directions:
  1. Preheat the oven to 400. Brush the chicken thighs with olive oil and sprinkle with salt and pepper. Place the thighs on a baking sheet and bake for 20-25 minutes.
  2. Meanwhile, heat a small skillet to medium-high heat. Slice the onion into thin rings and  add to the hot skillet with a splash of olive oil. Flip after 1 minute, and cook for additional minute. You just want to sear the onions! Put the onions in a small bowl with 2-3 tablespoons of bbq sauce (or whatever amount you feel comfortable with).
  3. Once the chicken is done (when pierced with a knife the juice should run clear!), chop the chicken into cubes. Put into the bowl with the onions and bbq sauce and toss to coat.
  4. Assemble the sandwiches by piling the chicken and onions and topping the bbq mixture with tomato and avocado slices.